

You don’t have to start your dahlias indoors, but it can be fun – and reassuring if you’re new to dahlias. Here’s how our long-time office manager Rita Bailey does it.
First of all, if you don’t see any eyes on your tubers when they arrive, don’t worry. This is perfectly normal. And if you do see eyes, you can skip right to step 4.
1. Start a month or even six weeks before your area’s last frost date. Find yours at almanac.com/gardening/frostdates.
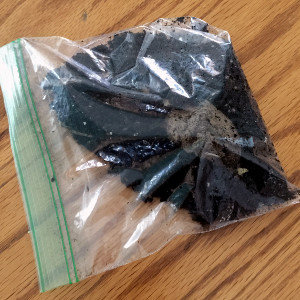
2. For each tuber you’ll need some potting soil, a zip-lock bag, and a clear plastic deli container. Any size is okay as long as the tuber fits, Rita says, since it won’t spend much time in either.
3. Put some moist (but not soggy) potting soil in the bag, lay your tuber on it, and close the bag most of the way. Set it someplace warm (room temperature is fine) and bright (but not in direct sun), and keep an eye on it.
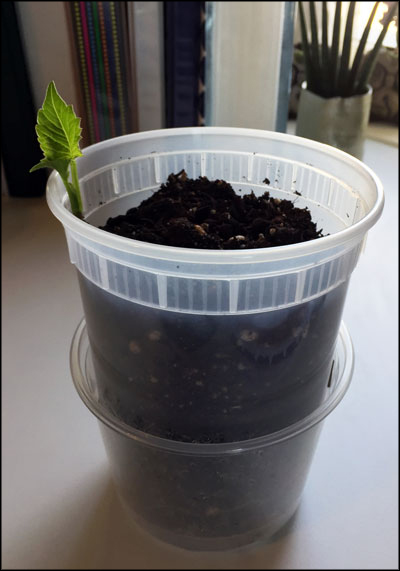
4. Within a week or two you’ll see eyes – little purplish or pale bumps like the eyes of a potato – emerging from the crown just below the old stem. Poke a drainage hole in the bottom of the deli container, fill it with damp potting soil, set it on a saucer (or in a shorter deli container, as in the photo below), and plant your eyed-up tuber with the crown covered by about an inch of soil.
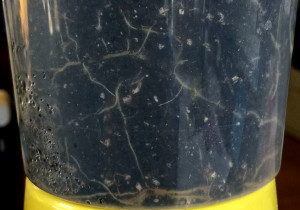
5. Keep it warm. Within a week or so, small white roots will begin to show at the sides of the container. Enjoy that sign of progress as you wait for the first sprout to emerge above the soil which, according to Rita, sometimes takes as long as two more weeks.
6. Once you see a sprout, give it as much light as possible and gently shake the container once or twice day to help strengthen the new growth.
7. As your last-frost date approaches, get your dahlia acclimated to outdoor conditions by hardening it off. This means setting it outside for a short period of time every day. Start with an hour or so in a sheltered spot and gradually increase the time and exposure until your plant is tough enough to spend all day in full sun.
8. When it’s hardened off and the last-frost date is past, gently remove it from the container and plant it outside, burying the tuber a little deeper than it was in the container. Water it well and enjoy!


