SHOPPING CART
0 ITEMS
Jun
30
2021

Lessons Learned from a Lifetime of Gardening

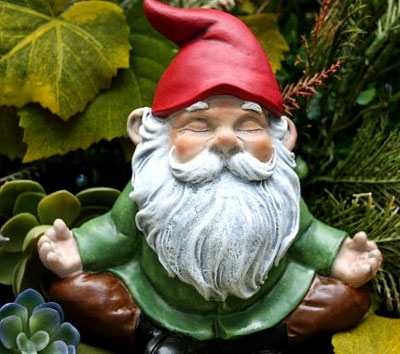
I’ve been gardening since I was seven or eight, inspired by a love of nature and a grandmother who nurtured me along with her plants.

And though I’m still constantly learning, here are a few of the lessons the garden has taught me so far and that guide me today. Hopefully some of them will resonate with you, and maybe get you thinking about what you’ve learned so far and what guides you today in nurturing your own little bit of paradise.

the garden I have now, this past May

Garden for yourself. There’s nothing wrong with making your front yard look good for the neighbors, or planting native plants for pollinators, and so on. But the garden is one of the few places in life where you can truly follow your own heart, and I think you’ll find it’s a lot more fun when you do that. But please remember ….

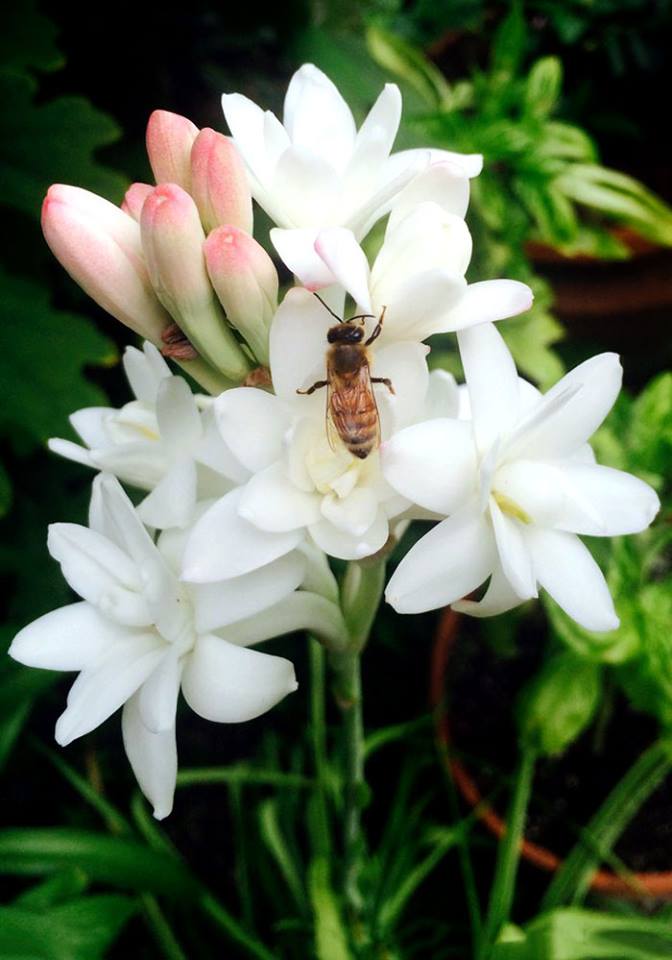
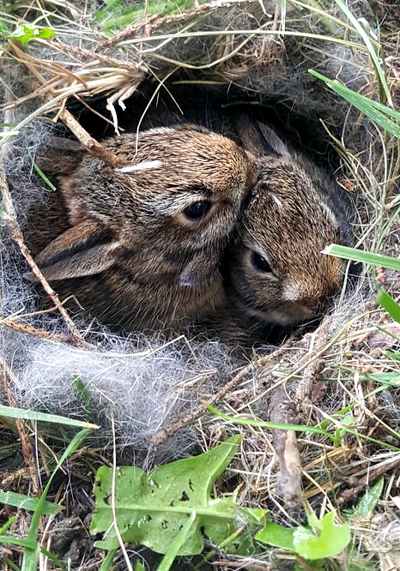
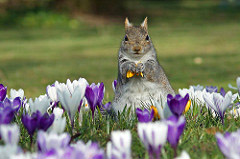
Your garden is their home. The older I get, the more I feel for the thousands of tiny creatures that live in my garden: bees, ants, worms, spiders, and all the rest. Most of them are good for the planet, they work harder than I do, and they love my garden, too! Now instead of being a clueless Godzilla rampaging through their world, I look out for them – and that has made my gardening more interesting and satisfying.

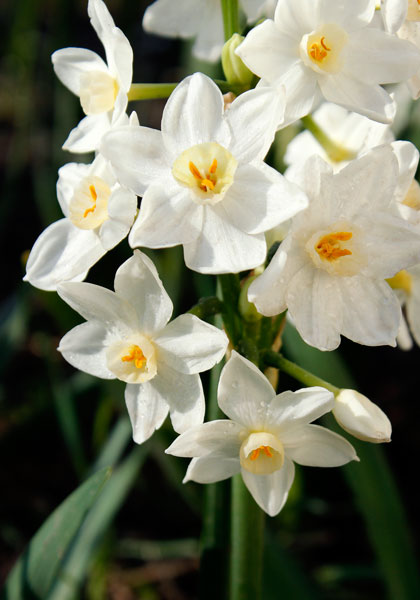
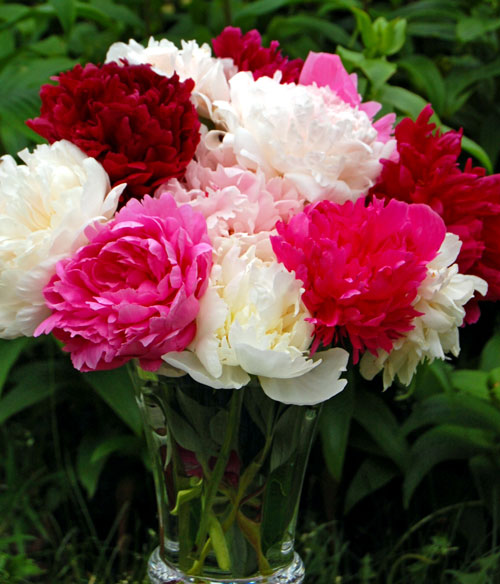
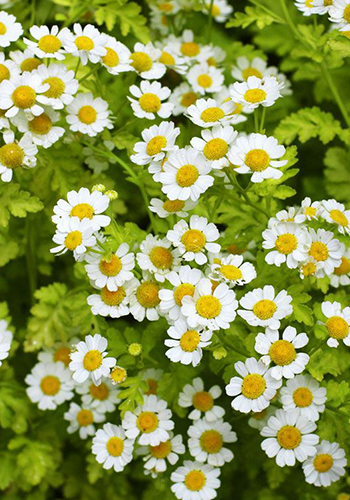
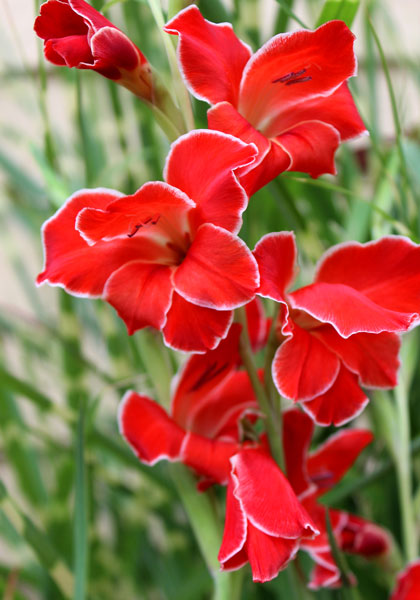
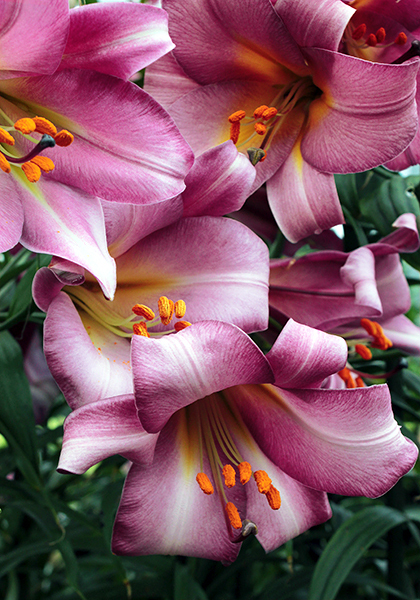
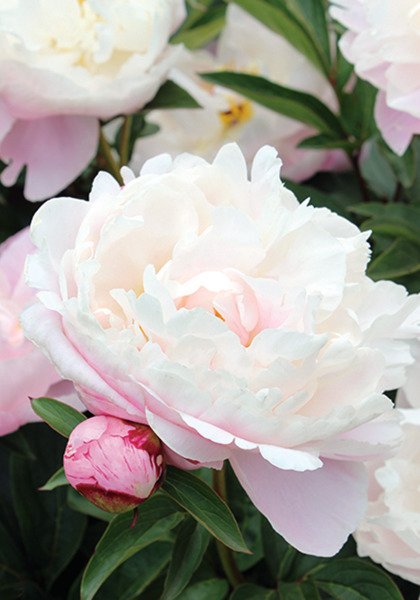
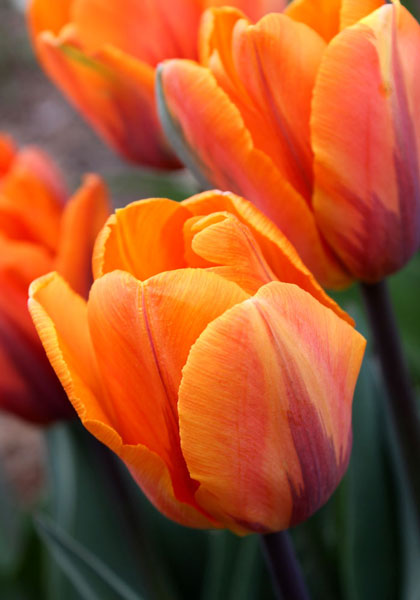
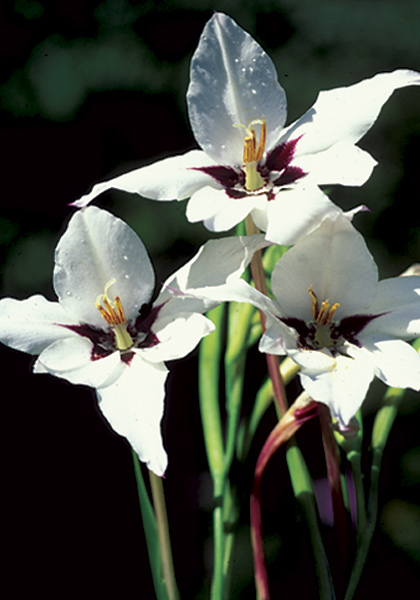
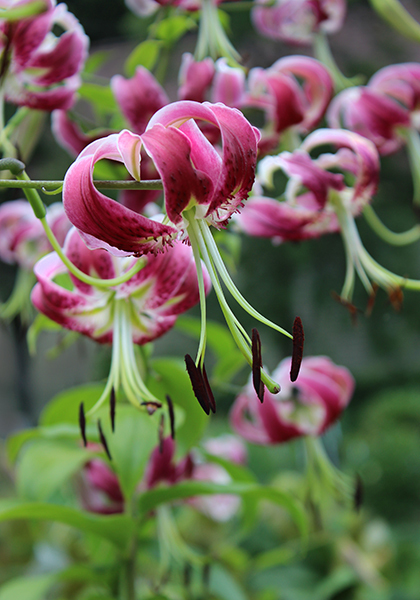
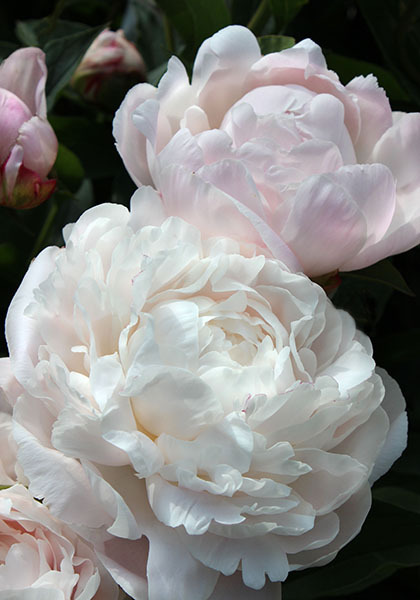
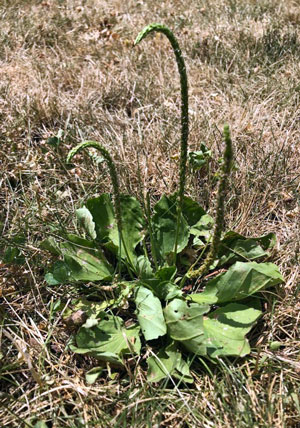
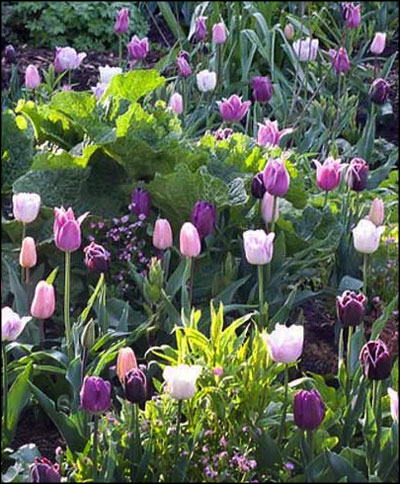
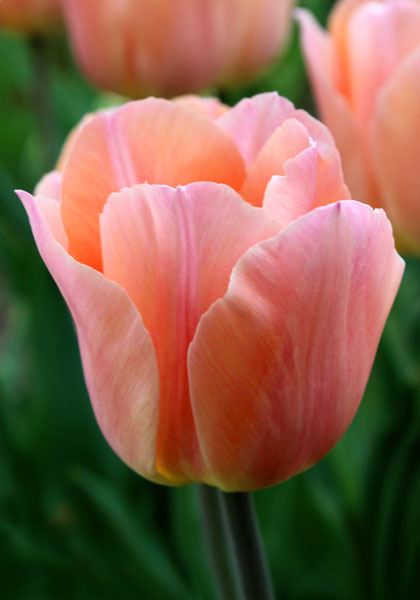
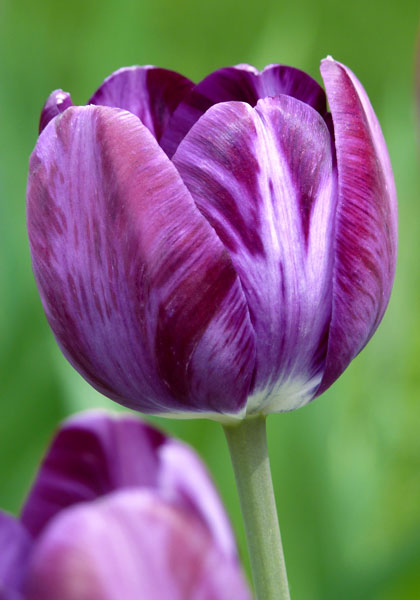
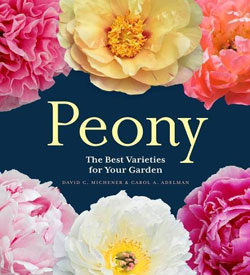
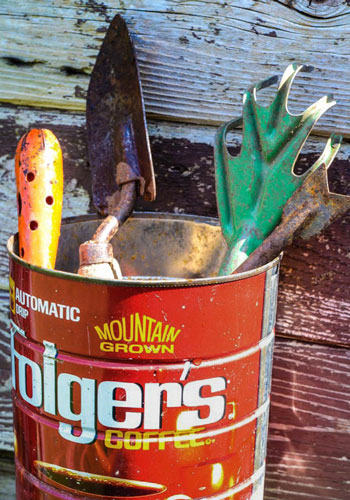
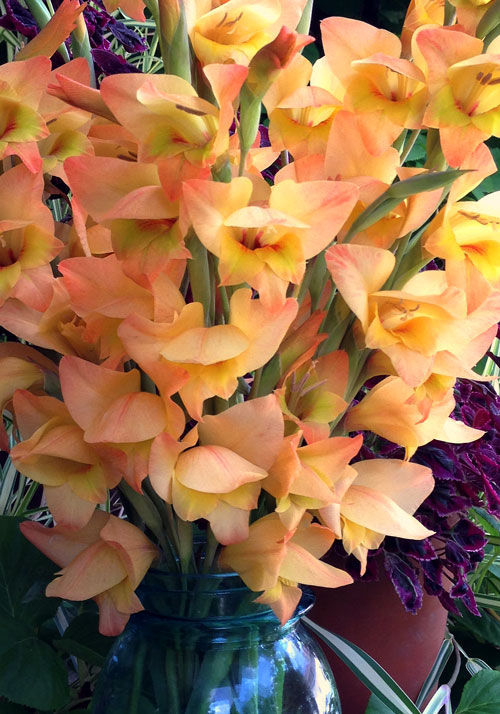
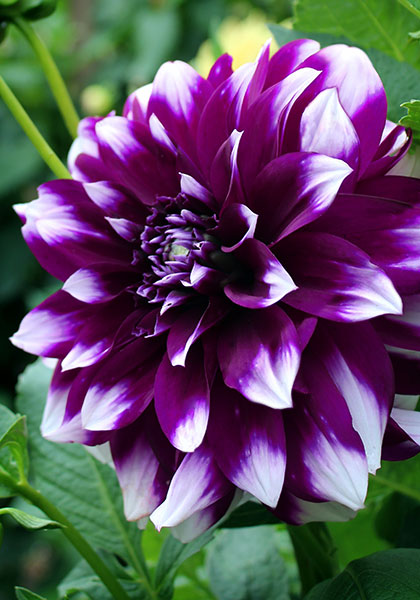
It’s mostly about the plants. Garden history books usually emphasize design and constructed features rather than plants, and some garden magazines do that, too. But for most of us gardeners, plants are the heart of the garden. They’re why we garden. Sure, we like to arrange them so they look good, and we probably have some garden furnishings, but we’re not landscape architects, we’re plant lovers. Never feel as if that’s somehow less worthy. Embrace it.

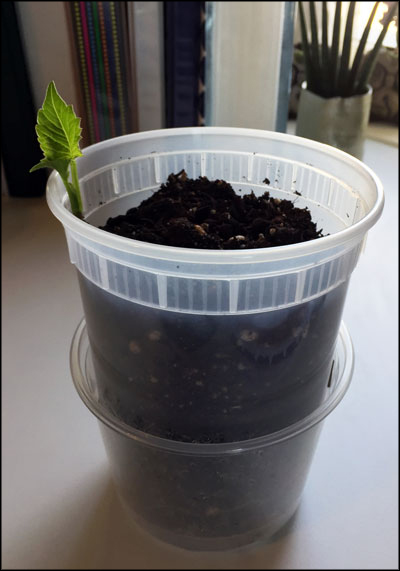
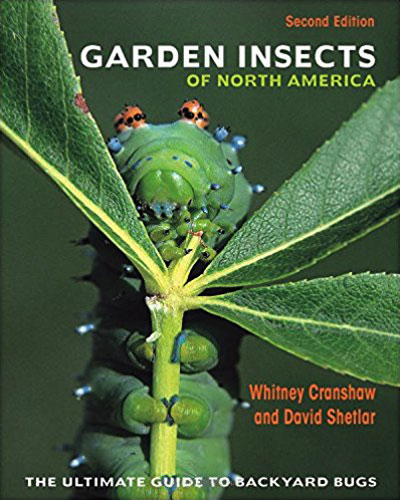
Step one is paying attention. It’s a lot like “showing up” for your kids. If you’re not out there really looking at your plants on a regular basis, you’re not going to know what’s going on and small problems – weeds, pests, whatever – will soon become big ones. Also, nothing can teach you as much about your plants as they will, if you’re paying attention, and the more you look closely at them, the more you’ll enjoy them.

Don’t be daunted by the hype. It’s easy to get seduced by photos of a spectacular garden, a blog post about how easy it is to grow something, or an enticing catalog description. But reality often falls short of these rosy visions, and that can get discouraging. Instead, remind yourself that much of what you see and read about gardening is more like la-de-da Hollywood movies than the real world and you’ll be a much happier gardener.

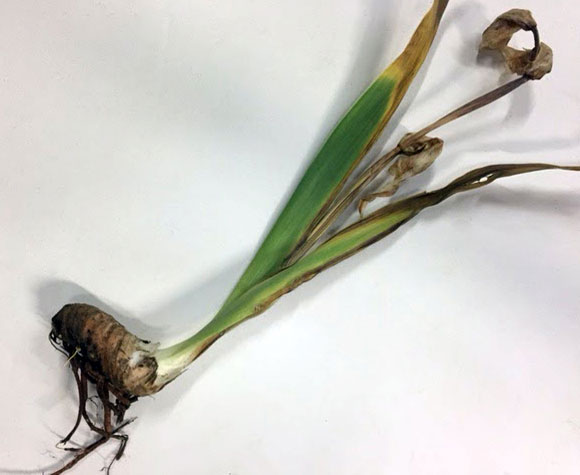
You will make mistakes. Lots of mistakes. Learn from them and it will lessen the sting, plus you’ll do better next time. And forgive yourself. Not everything is in your control, and no one is perfect – just like in the rest of life.

Editing is more important than planting. Adding new plants to the garden is fun, but since plants are always growing and changing (and we all make mistakes!) it’s good to keep looking at your garden with a critical eye and pruning this, moving that, and getting rid of plants you no longer love. Without editing, no garden will ever look its best – and sometimes you need to be ruthless about it.

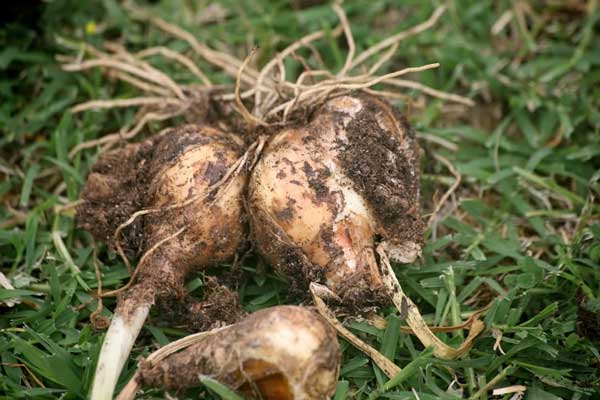
Weeding is endless. Learn to love it. Weeds will always be a part of your garden, and once you accept that, plan for it, and keep after them, you may find that what was once a dreaded chore is relaxing, even soothing, and gives you time to enjoy your garden up close while your thoughts wander freely. What’s not to like about that?

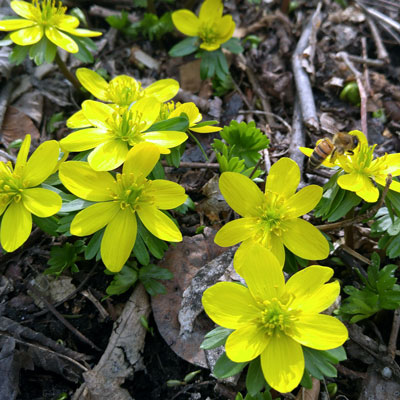
Start early, go late. We all love spring, but it’s not much fun when it gets so busy that you feel rushed and overwhelmed. I’m sure I’ll never avoid that completely, but I’ve learned to garden longer in the fall, doing as much as I can then so I won’t have to do it in the spring, and then I start again as early as I can in the spring. Yes, it’s cold, and I have to push myself to get out there, but the payoff is worth it, and I’ve come to actually enjoy doing it.

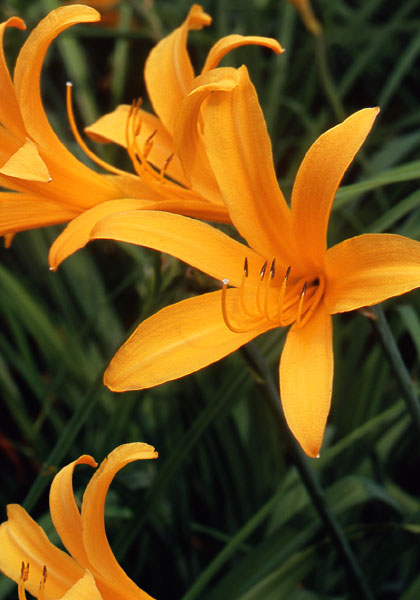
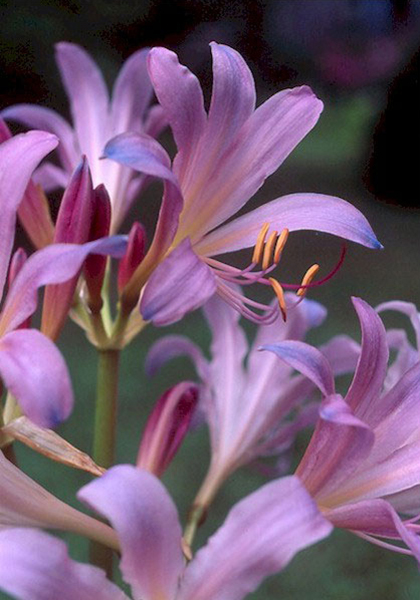
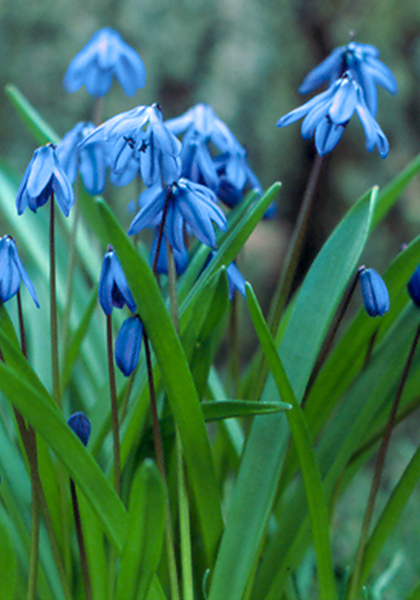
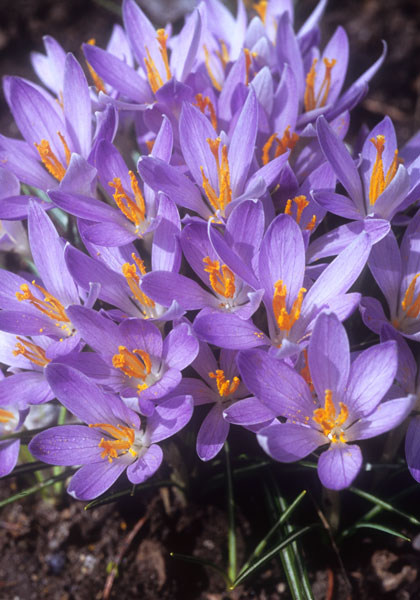
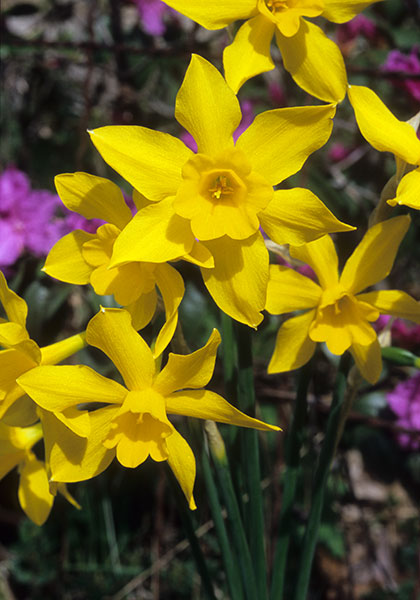
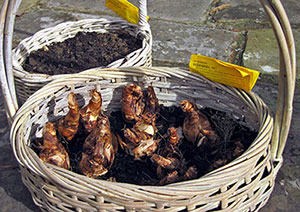
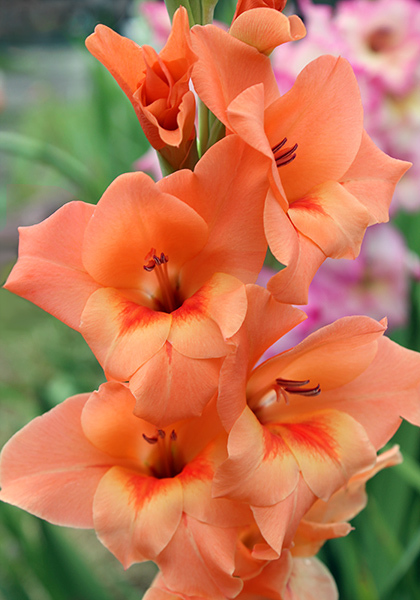
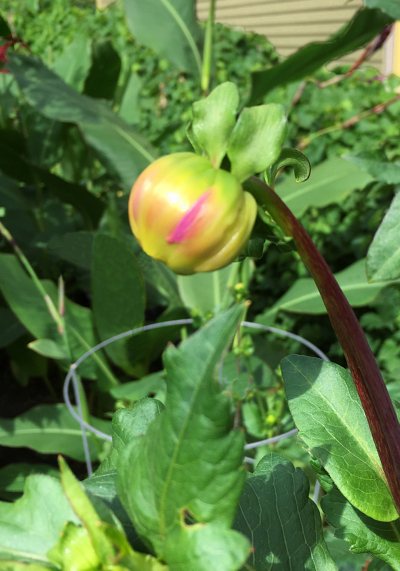
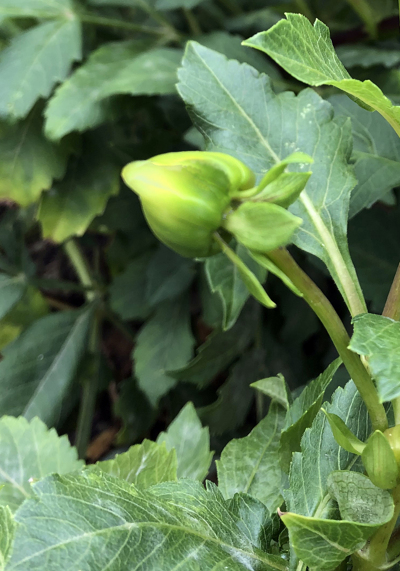
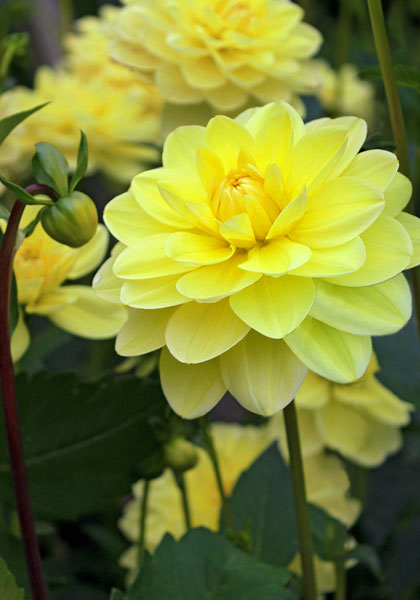
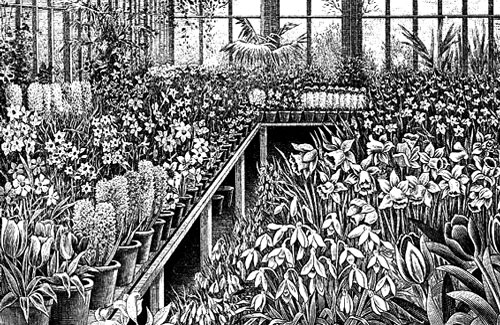
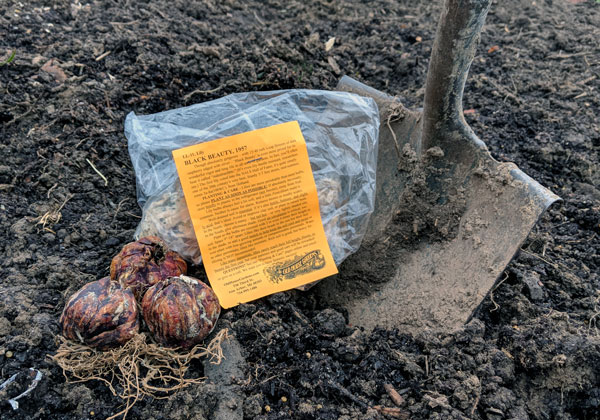
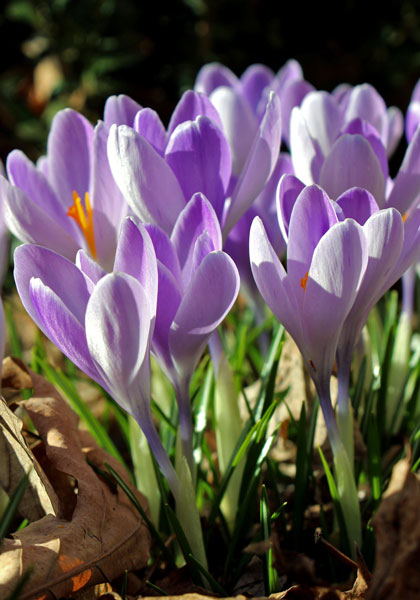
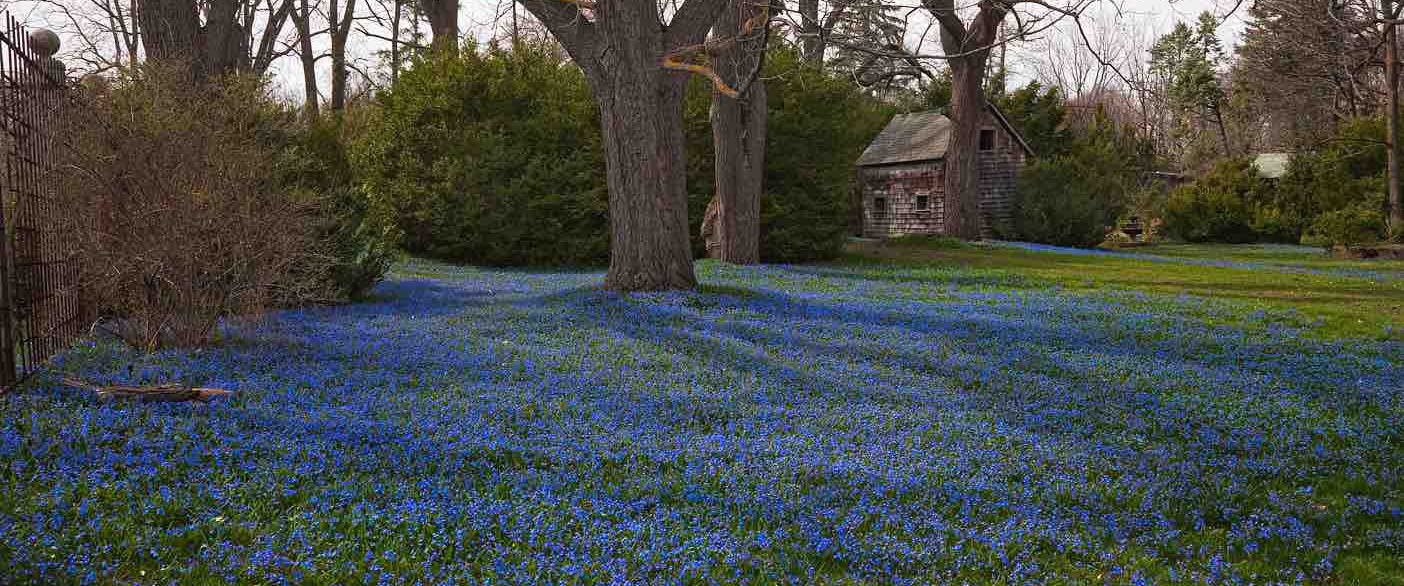
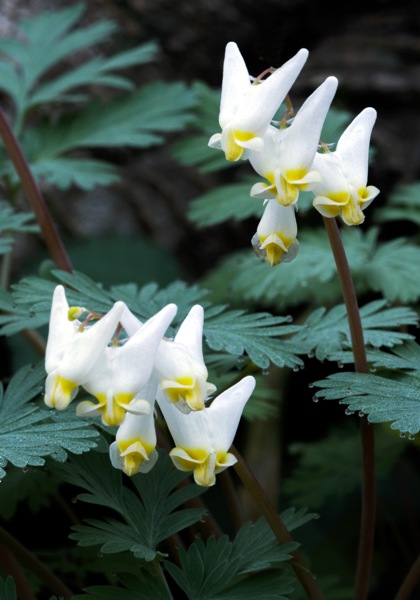
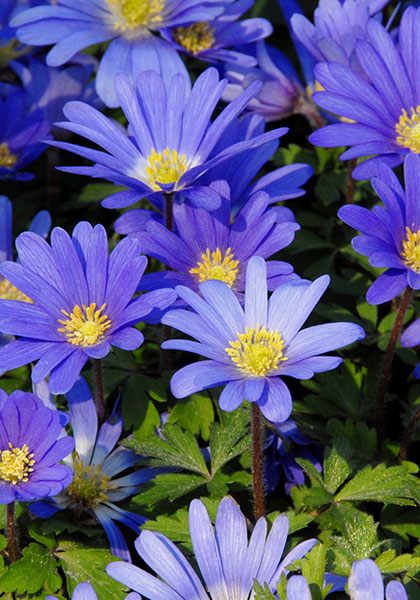
Cultivate anticipation. Looking ahead is one of the greatest pleasures in gardening, so make the most of it. Daydream about your newly-planted bulbs all winter long, admire your buds as much as your flowers, and enjoy not only the garden you have now but the one you’re constantly planting and reshaping in your imagination.

Pass it on. I think I was born a gardener, but I got some important inspiration and encouragement along the way from my Grandma Billie, my dad (who helped me plant my first gardens), Sally Campbell (who paid me to do what I loved doing), Art Tucker (who opened my eyes to heirloom plants), and a host of other gardeners. You can pass that gift along, too, and when I think of my four-year-old grandson excitedly showing me the flowers he asked his parents to buy him at the farmers’ market, I can promise you that it will bring you enormous joy as well.

That’s not all, of course, but I have to go. Happy gardening!

Jun
18
2021

Learning from You:
Beating the Lily Leaf Beetle with IPM

In our March newsletter, we published “If You Give a Friend a Lily” about our good customer Randy Merrill and her lily-obsessed friend Paul Siskind.

Soon after, Paul emailed us saying, “As part of my research on the red lily leaf beetle, I developed an IPM (Integrated Pest Management) approach for controlling it in a relatively safe manner” – and here it is. Thank you, Paul!

Start early – The most important strategy is starting early, as soon as your lilies break dormancy. [We know it’s too late for that this year, but ….]

Keep at it all season long – Controlling beetles and grubs throughout the season, even if your lilies look okay, will cut down on the beetles that attack them next year.

Hand-picking is key – It may not be enough by itself, but hand-picking is safer than using insecticides and it will reduce the amount of insecticide you need to use. Diligence and thoroughness are critical, especially in the first 4-6 weeks of the season. Try to hand-pick at least once a day then. After mid-season, this chore will lessen considerably.

How to hand-pick – Fill a coffee mug half-way with soapy water. For beetles, slowly move the mug under the leaf that the beetle is on so that, when it startles and lets go, it falls into the mug. For grubs, which are slimy and difficult to squash, hold the mug under the leaf and flick the grub into it. For eggs and newly-hatched grubs, which are usually hidden on the underside of leaves, either run your fingers along the leaf blade to squash them or simply cut off the outer half of the leaf.

Best pesticide – If you have a moderate to severe infestation, the most effective insecticide is spinosad, because it kills both beetles and grubs. However .…

Avoid resistance – One of the principles of IPM is to prevent the pest from developing resistance to an insecticide. Thus, this method also calls for using neem oil. Even though neem oil kills only grubs (it repels beetles), it’s important to kill any grubs that might become resistant to spinosad.

Use the RIGHT neem oil – Neem oil is extracted in two different ways, but only one works for lily leaf grubs. Unfortunately, alcohol-extracted neem oil – which is most common – contains only ‘clarified hydrophobic extracts of neem’ and lacks the grub-killing compound azadirachtin. What you need instead is cold-pressed neem oil which is sometimes listed as ‘pure’ neem oil.

How to spray – As with any insecticide, use as little as necessary. Aim directly at the lily leaves only and avoid spraying the flowers. Avoid spraying when it’s windy or in midday sun which can cause leaf-burn.

When to spray – At the beginning of the season, try to spray the lilies twice a week, once with spinosad and then a few days later with neem. On days you don’t spray, do your usual hand-picking. After 4-6 weeks, the beetles mostly stop laying eggs, and you should see a marked decline in the number of beetles and grubs. At this point, reduce spraying to once a week with spinosad. If you find some grubs, you can spot-spray with neem. Continue hand-picking.

Diatomaceous earth – Although dusting with this is often recommended, my studies have shown that it’s not that effective. There’s no harm in using it, though, and it may help some.

Deer repellent with clove oil – If you use deer repellent, choose one with clove oil because that seems to be at least somewhat effective in killing or at least repelling the beetles.

Be patient and have faith – It might take a full season (or two) to subdue a bad infestation, but once it’s under control I think you’ll find it’s not that difficult to incorporate this IPM method into your normal gardening routine.”

Mar
11
2021

“Hotumn” – Dahlias and More
for Today’s Longer, Warmer Fall

“Fall is lasting longer,” writes Martha Leb Molnar in the April 2020 issue of Horticulture. “The average length of the growing season in the Lower 48 has increased by nearly two weeks since the beginning of the 20th century, according to the Environmental Protection Agency, with a particularly large and steady increase over the past thirty years.

“For gardeners in temperate zones, this offers new opportunities. With careful planning, we can now enjoy a long-lasting fall garden as glorious as a spring or summer one. . . .

“The time to plan for ‘hotumn’ is now. By keeping fall in mind in the spring, we can go well beyond potted mums and ornamental kale.”

So what should we plant now to enjoy this fall?

“It’s hard to resist the allure” of dahlias, Molnar writes, and if you’ve grown them you know what she’s talking about. Cool night temperatures spur them into profuse bloom, making fall their glory season.

In addition, Molnar recommends ornamental grasses (of course); shrubs such as hydrangeas, potentillas that “bloom from midsummer to frost,” and landscape roses; long-blooming perennials such as asters, sedum, artemisia, coreopsis, black-eyed susan, gloriosa daisy, and yarrow; late-blooming perennials such as Joe Pye weed, Japanese anemone, turtlehead, bugbane, Helenium, Russian sage, and giant dill – and did we mention dahlias?

Nov
18
2020

“Enthusiastic Fillers”
to Hide Yellowing Bulb Foliage

Johnny-jump-up

Tasha Tudor was not only a beloved author and illustrator of children’s books, she was an avid gardener with a special love of heirloom flowers – including our bulbs.

But fading bulb foliage is never pretty, and Tudor offered some good advice for hiding it in a 1998 article by Tovah Martin for Horticulture magazine. The first four plants she mentions are hardy, self-sowing annuals in much of the country, which means you can plant them right now by just sprinkling their seeds on top of the soil and letting Mother Nature do the rest. (Planting in early spring will work, too.)

“Spring arrives late in Tasha Tudor’s New England garden,” Martin wrote, “but when it comes, it arrives with an onslaught of bulbs. The bulbs don’t last forever, though, so Tasha plans ahead for summer.

feverfew (This golden-leaved variety is my favorite.)

“Even before the foliage of the bulbs ... begins to turn brown, an underplanting is gearing up to mount the stage and steal the show. Of course, Tasha will insist that she doesn’t underplant specifically to hide the dying bulb foliage. The forget-me-nots [Myosotis sylvatica] and Johnny-jump-ups [Viola tricolor] ... now appear in profusion of their own accord. But at one time, they were certainly planted to take up the tempo as the bulbs fade.

“Meanwhile, other enthusiastic fillers take full advantage of Tasha’s hospitality. Feverfew [Tanacetum parthenium] seeds in wherever it finds open ground. Annuals are also tucked here and there in promising nooks and crannies. Sweet alyssum [Alyssum maritima] is Tasha’s favorite and most frequently employed annual for the purpose.... Later the dianthus [pinks] flushes out; valerian [Valeriana officinalis] adds flowers, and lady’s mantle [Alchemilla mollis] adds leaves. By June, you would never guess that the garden was once running rampant with narcissus and that beneath the lush garden, bulbs are slowly slipping away.”

Nov
14
2020

A New, Very Old Way to Store Your Glads

Glads are easy to store. Every fall I just dry mine, dust them with a fungicide, and hang them up in mesh bags in a room that’s cold but never freezing.

Experiments at the University of Florida, though, suggest there may be a better way.

corms ready to bury in sand

According to Dr. Robert Magie in a 1993 article that was reprinted recently in Glad World, “When in the early 1960s gladiolus growers in Florida began placing freshly harvested, cleaned, and treated corms in soil storage with little or no curing” – which typically involves air-drying them at temperatures– “I conducted experiments to learn what ... effects the lack of ordinary curing would have on flower production and disease control.

“The results … were entirely unexpected. We harvested more marketable flower spikes and more sound corms when … corms were not cured as usual but placed in cool storage a few days after lifting. In other tests, the longer we cured the corms the poorer the production of flower spikes and corms.” Furthermore, when corms were cured and stored in “sawdust or sand, we harvested more spikes and corms than from corms cured in the air.”

'Peter Pears', one of the glads I'm storing differently this year

This makes sense, Magie says, because until humans “began to lift and store corms to be replanted, glad corms had always grown where the seed started to grow (except for the corms dug up and eaten by baboons). Natural conditions for all those millennia in native Africa were as follows: corms cured slowly in dry soil at the end of a six-month rainy season. They rested in warm soil until cool, wet weather arrived six months later…. Thus, glads were conditioned for a million years to a sedentary life in soil.”

I figure it’s worth a try, so I’m planning to store a few corms this fall in sand and a few others in sawdust (if I can find some) or the cedar animal bedding I use for dahlias.

If you try it, too, please let us know your results – and watch out for baboons!

Oct
14
2020

Do it NOW: Protect Your Iris and Peonies
with an Easy Fall Clean-Up

We say this every fall because it’s just so darn easy and important: For more flowers and healthier plants, give your peonies and iris a simple fall clean-up.

PEONIES – Although relatively care-free, peonies can be afflicted by powdery mildew (pictured here) and other fungal diseases.

To prevent spores from overwintering, cut stems as close to the ground as possible, carefully bagging everything as you go. It’s best to do this earlier rather than later, before the leaves get dry and crumbly – or even as early as August if the foliage has been hard hit.

Disinfect your tools with rubbing alcohol or bleach between plants to avoid spreading disease. Dispose of all clippings in the trash. Do not compost!

If you’ve tried this and still have problems, you may also want to try a fungicidal spray. Mancozeb is one good choice. Drench the ground around the base of the peonies after your fall clean-up, and then spray in spring as soon as sprouts emerge and again every 7-10 days until bloom-time.

IRIS – Fall is also the best time to control iris borers which are a common pest in gardens east of the Rockies.

Borers hatch in spring from eggs laid in the fall on iris leaves and anything similar that’s nearby. To destroy them, simply (a) wait until a hard frost kills the adult moths and then (b) cut back all leaves to a couple of inches and (c) remove, bag, and throw the clippings in the trash along with any nearby debris or mulch. Do not compost!

Fungal diseases such as leaf spot may also afflict iris, and fungicides such as mancozeb can help control them, too. Spray after fall clean-up and once again in early spring.

Healthier plants look better and bloom more – so get out there and give yours a hand!

Sep
16
2020

It’s Dahlia Season! Tips for Cutting and Arranging

With night temperatures cooling as fall approaches, the dahlias in my garden are blooming exuberantly. If yours are, too, here are some tips for enjoying their bounty from cut-flower grower Michael Russo as reported by Sherri Ribbey in the October 2020 issue of Garden Gate.

“The best time to cut dahlias is in the morning before 10 AM so plants are well hydrated. Watering the night before can help if rain has been scarce. When you’re cutting long stems for arrangements, cut above a pair of leaf nodes ... and the dahlia will rebloom.

“Check the back of the bloom when you’re cutting. If it’s starting to curve, it’s too old and won’t last as long in the vase. Look for dahlias with a flat back to get the most life – usually 5 to 7 days. Put the cut stems in a bucket of water right away to help keep them fresh.”

As for arranging them in a vase, “Michael often uses an analogous color scheme (colors that are next to each other on the color wheel)” to produce “a harmonious feel.” To “create drama,” on the other hand, he recommends choosing complementary colors. “The strong contrast between colors across from each other on the color wheel is sure to turn heads.”

Although my dahlia bouquets tend to be mostly dahlias – or even just one dahlia – Russo’s include an inspiring array of other stuff found in many fall gardens: hydrangeas, goldenrod, fountain grass, tomatillos, dark red hibiscus foliage, the feathery seedheads of clematis, and even an unruly spray of hops.

So what’s in your dahlia bouquets? We’d love to hear from you, or send us a photo. In times like these, virtual bouquets are a healthy treat!

Jul
15
2020

What’s That Weed?
(And That One? And That One?!?)

The longer I garden, the more impressed I am with weeds. They sure have figured out a lot of ways to travel around, to outsmart anyone who tries to get rid of them, and to spread their progeny far and wide.

That’s one reason I’ve been trying to get to know my weeds better this year. The more pressing reason, though, is that last year I grew some self-sowing flowers that were new to me (two favorites: green Nicotiana langsdorfii and towering kiss-me-over-the-garden-gate) and this spring when I started weeding I realized I wasn’t always sure which sprouts were weeds and which were volunteers from my new self-sowers.

Searching online I found a booklet titled Common Weed Seedlings of the North Central States with photos and descriptions of over 50 of them. Eureka! Even if you live somewhere else, there’s a good chance you’ll find this guide helpful since weeds tend to be highly adaptable and widespread. You can buy a print copy here or view the entire booklet online here.

Another site I’ve been turning to frequently is the New Jersey Weed Gallery – even though New Jersey is 600 miles away. The main page looks like a wall of “wanted” posters, and it’s easy to scroll down it till you find what you’re looking for – or get sidetracked by something else you recognize. The names are entertaining, too: smartweed (aren’t they all?), shepherd’s purse, mouse-eared chickweed, and two that seem made for a romance novel – redstem filaree (pictured here) and hairy galinsoga.

For these and other weed-identification resources – including the 174-weed University of California Weed Photo Gallery and the 656-page Weeds of North America – see Margaret Roach’s “What Weed is It? Putting Names to Pesky Plants” at her endlessly helpful blog, A Way to Garden.

And happy weeding!

Mar
25
2020

For More Beautiful Daffodils Next Year, Start Now

Here are three simple tips for right now that will help make your daffodils even more beautiful next year.

Writing in Maine’s Camden Herald, our good customer Lynette Walther says first of all plant more daffodils – but where, and how do you remember those spots at planting time months from now?

“Cut some weatherproof markers from plastic yogurt containers or something that can be used to mark the bald spots where a clump of daffodils would look great next spring,” she advises. “Insert a marker in each sunny, well-drained spot, deep enough so that it will remain there all summer. Come fall when you’ve cleaned out the flower bed or border or wherever your markers lie, that is where you will rediscover them,” and you’ll know exactly where to plant your bulbs.

Then in a tip she calls her “crabby comment of the week,” Lynette says “Yes, everyone knows that after they are finished blooming, the daffodil foliage that is left behind looks rather icky. But don’t cut it off, and for the love of all things good, don’t be tempted to braid or twist or whatever it is you are compelled to do in an attempt to tidy it up. You won’t be fooling anyone. Just leave it alone! That tatty foliage is performing an important job that involves photosynthesis, and is in effect working to store enough energy in that bulb down below to enable it to bloom again next spring. So, hands off!”

Finally, Lynette writes, “Looking for some tried and true bulb selections? Visit the Old House Gardens website for a selection of trusted daffodil varieties.”

Good advice all around, we’d say!

Oct
9
2019

It’s That Time Again:
Easy Clean-Up Keeps Iris and Peonies Healthy

It’s important, so every year about this time we remind you that a simple fall clean-up will do wonders for the health of your iris and peonies.

PEONIES – Although they’re generally care-free, peonies can be afflicted by powdery mildew and other fungal diseases.

To prevent disease spores from overwintering, (a) cut stems as close to the ground as possible, and (b) carefully bag everything as you go and throw it in the trash, not the compost.

For best results, do this EARLIER rather than later. It’s okay if the leaves are still green, but if you wait until they’re dry and brittle, bits and pieces will break off and you’ll never find them all. (Yes, I learned this the hard way.)

IRIS – Fall is also the best time to control iris borers which hatch in spring from eggs laid the year before on iris foliage and similar stuff nearby.

To destroy them, wait until AFTER a hard frost kills the adult moths and then (a) cut back all leaves to a couple of inches and (b) remove, bag, and trash – don’t compost – the clippings and any nearby foliage, debris, or mulch.

Pretty easy, right? And remember, healthier plants grow better and bloom more!

Sep
18
2019

Kids Love Eating Purslane, Too

Last month’s article about delicious, historic purslane apparently struck a chord with many of you, including Letty Savage of Sewickley, Pennsylvania, who emailed us to say:

“Loved the article on purslane. We run a kids’ garden club during the summer at our local Fern Hollow Nature Center. Each meeting features a snack, preferably something we have harvested from the garden. One week there were no vegetables ready to harvest so we picked purslane. We made a casserole using an old recipe from Euell Gibbons’ Stalking the Wild Asparagus and the kids just loved it. They also liked it raw. It makes a great snack to forage while weeding.”

In case you’d like to try that casserole, here’s the recipe from Gibbons’ classic 1962 book:

purslane thriving in my garden

“Boil the tips ten minutes, drain, and chop fine. Stir one beaten egg into the purslane, then stir in as many dry bread crumbs as the mixture will dampen. Season to taste with salt and pepper, then bake in a moderate oven until the top is nicely browned.”

And here’s another of Gibbons’ purslane recipes, which sounds even tastier to me:

“Cut several slices of bacon in small pieces and fry them in a large skillet. When the bacon is done, dump in about one quart of the tender tips of purslane. Stir until evenly coated with the bacon drippings, then cover and let it cook 6 or 7 minutes. Season with salt and a little vinegar.”

Mmm-mmm, purslane!

Sep
12
2019

Dahlia Deadheading Dilemma:
Is That a Bud or Seedpod?

It’s dahlia season and hopefully yours are full of flowers. (If not, the hot summer probably slowed them down, but hang in there. Cooler temperatures spur growth and bloom.)

Deadheading – which means cutting off the fading flowers – will help you get the most out of your dahlias. It keeps your garden looking neat, allows the plants to redirect energy from making seeds to more flowers, and it gives you a close-up view of your dahlias’ awesome beauty.

But since we’re all living in the real world instead of a garden book, there may be times when you don’t quite manage to cut every fading flower before all of its petals have dropped. When that happens, you’ll find that some seedpods look a lot like buds. Here’s how to tell them apart – most of the time.

Dahlia buds usually look like flattened balls, as you can see in the photo on the left above.

Dahlia seedpods, on the other hand, usually have a longer, more conical shape, as in the photo on the right.

Unfortunately, this isn’t a hard and fast rule because dahlias are so wonderfully diverse. The buds of ‘Nonette’, for example, are cone-shaped, while the seedpods of single dahlias are often cylindrical. But if you remember to (a) look at other buds on the plant and (b) keep the flattened-ball vs. longer/conical distinction in mind, you should be able to deadhead with confidence.

Good luck, and enjoy your dahlias!

Sep
6
2019

How I Learned to Stop Hating
the Rabbits in My Garden

We all share our gardens with a multitude of other creatures. Some of them, such as birds, bees, and butterflies, I’m always glad to see, but others not so much.

Until five or six years ago I’d never seen a rabbit in my garden here in the middle of Ann Arbor, but now they’re everywhere. My wife says they’re cute and insists on calling them bunnies, but since they love to eat my crocus, larkspur, lilies, and other flowers, I pretty much hated them – until recently.

not my rabbits, but a similar nest

I was mowing our small backyard for the first time in maybe a month, and the grass was unusually long. I had gotten to the middle of the yard when I noticed a matted down clump of dry grass in the strip I’d just mowed. As I bent down to pick it up – it wiggled.

I jumped back in alarm, but then I cautiously pulled aside some of the grass and there, lying on its side, was a tiny rabbit. At first I was worried that I’d injured it, but it seemed unharmed, although no doubt traumatized by the mower roaring over it. I covered it back up as best as I could (I’m not a barbarian) and added some dry ferns to replace the protective grass I’d cut.

It seemed crazy that a rabbit would build its nest in the middle of a lawn, but later I read it actually makes sense because predators rarely venture there. I also learned that baby rabbits have virtually no scent, and that the mothers nurse their young for just a couple of minutes twice a day, keeping their distance the rest of the time so predators won’t be drawn by their adult scent.

I still wasn’t a rabbit lover, but the next day something happened that amazed me. I was watering some plants in the backyard when I noticed a squirrel heading out towards the nest. All of a sudden, a rabbit burst out of a nearby patch of daylilies and launched itself high in the air as if to jump on top of the intruder. The squirrel ran off a couple of yards, but that wasn’t enough for the mother rabbit. She leaped at it again, like a superhero swooping down from the sky, and the squirrel gave up and ran away.

As a man who loves his kids and grandkids more than anything, I admired that mother rabbit. For a moment I saw the world through her eyes and discovered that we have more in common than I thought. Of course I’ll still curse when I find my plants nibbled on, but I felt my heart grow a little bit bigger that day, and I’m grateful for that.

Aug
14
2019

Too Hot? Too Wet? What’s It Doing to Your Bulbs?

Hotter summers are getting to be the norm for much of the country, but this year many areas have had a lot more rain than usual, too.

How will it affect your bulbs? It depends.

DAHLIAS – Spring was unusually cool and wet in many parts of the country, and that’s a tough combination for newly planted dahlias. If some of yours failed to sprout, that’s probably why. Next year wait until late spring to plant them, and if the long-term forecast calls for unusually cool or rainy weather, wait a bit longer.

Once they’re up and growing, though, dahlias prefer cool nights, and heat waves can slow their growth to a standstill. But don’t worry. When cooler temperatures return, they usually kick back into gear and go on to bloom normally.

GLADS & CROCOSMIA – Thrips are tiny, almost invisible sucking insects that multiply rapidly in hot weather. If your glads or crocosmia have pale or rusty streaks on their leaves, don’t delay – spray with an insecticidal soap. Since these soaps kill only on contact, be sure to coat the leaves thoroughly on both sides. You’ll probably need to spray again in a week or two, so put a reminder in your phone and stay vigilant.

High heat can also make narrow-stemmed glads like ‘Atom’ grow in a zig-zag fashion as they droop slightly during the day and then grow upright again at night.

LILIES – Thanks to plenty of rain, the lilies in my garden this year have been taller and more floriferous than ever. One Henry’s lily, for example, is currently almost eight feet tall – two feet taller than usual – and loaded with three dozen buds and blooms. But since this summer has also been unusually hot, the flowers haven’t lasted as long as they usually do, and some varieties – such as ‘Pink Perfection’ – haven’t been as richly colored.

PEONIES – Peonies usually like ample water, but warm, humid conditions can spur the growth of mildew and fungal diseases that disfigure their leaves and rot their stalks. At the first sign of these problems, remove the diseased tissue and throw it in the trash, not the compost. Then sterilize your pruning shears with bleach or alcohol before moving on to another plant.

TULIPS & HYACINTHS – In the spring, tulips like cool temperatures and plenty of moisture, but once they go dormant, they can rot in soil that stays too wet for too long. This is also true for hyacinths, to a lesser extent. If you’ve had an unusually rainy summer, there’s a good chance fewer of your tulips and hyacinths will return and bloom again next spring.

Although it can be frustrating at times, I think our dependence on the weather is one of the things that makes gardening so enriching. It keeps us on our toes, tuned into nature, and gives us a hands-on understanding of what climate change can mean for all of us.

Aug
9
2019

Eat Your Weeds – Delicious, Historic Purslane

purslane thriving in my garden

Purslane is the weed of the moment in my garden right now. I swear if I look away for just a day or two, areas that were perfectly weeded are covered with big sprawling mats of it.

With its flat, succulent leaves, purslane is part of the Portulaca genus which also includes the heirloom annual moss rose. Its seeds germinate best when soil temperatures reach 90 degrees, which explains why I’m seeing so much of it right now. And it does grow quickly, producing seeds just three weeks after it sprouts – which can remain viable for up to 40 years! Plus any pieces that get missed while you’re weeding can root and grow into new plants, so I’m sure I’m going to be battling purslane in my garden forever.

But here’s the good news – purslane is both tasty and nutritious, and it has a deep history.

“The moisture-rich leaves are cucumber-crisp, and have a tart, almost lemony tang with a peppery kick,” writes Laura Vozzella in the Baltimore Sun, and it’s frequently compared to watercress and spinach (though to my taste buds it’s milder than all of the above). It’s also rich in Omega-3 fatty acids, vitamin A, vitamin C, iron, magnesium, and even melatonin.

"wild purslane" in Gerard's Herbal, 1597

“Fresh young plants” are best, writes Sandra Mason of the University of Illinois Extension, “especially young leaves and tender stem tips.” She recommends eating it “in salads or on sandwiches instead of lettuce or pickles. Next time order a ham and purslane on rye,” and adds that purslane “can also be cooked as a potherb, steamed, stir-fried, or pureed.”

According to Wikipedia, “archaeobotanical finds … are common at many prehistoric sites” in the eastern Mediterranean, and by the Roman era purslane’s “healing properties were thought so reliable that Pliny the Elder advised wearing the plant as an amulet to expel all evil.”

In his great Herbal of 1597, Englishman John Gerard described two forms, “garden purslane” and the similar but smaller “wild purslane” which “cometh up of his own accord in allies of gardens and vineyards.” (Sound familiar?) It was “much used in salads, with oil, salt, and vinegar,” he said, and he listed over a dozen herbal uses for it, from provoking appetite and soothing toothaches to treating hemorrhoids and “killing worms in small children.”

I could go on and on – who knew a weed could be so interesting? – but I’ll just recommend a couple of excellent articles if you want to explore further: the Baltimore Sun’s “Purslane: A Weed Worth Eating” and “What to Do With Purslane” at Epicurious.com.

Happy weeding – and eating!

May
29
2019

“Can You Grow Dahlias in One-Gallon Pots?”

‘Preference’ and friends

“Yes indeed,” wrote Rolf Reisgies, in the March 2018 Bulletin of the American Dahlia Society. “Nothing to it!

You may remember we reported on growing dahlias in buried pots a couple of years ago, but Ralph grows a LOT dahlias this way so we thought you might like to hear what he has to say about it.

After experimenting with a few the year before, Ralph planted all 200 of his dahlias in one-gallon pots in 2016 and 2017. He potted them up indoors so they’d be sprouted and growing before he planted them in the ground of his Wisconsin garden in early June.

Most grew and bloomed normally. In fall after the first frost, he writes, “we chopped off the plants with the machete, waited a few days for things to dry up, and lifted the pots. The difference in the physical work is amazing! One poke with the spade – done.”

Ralph says the tubers in the pots grow four different ways: “Some develop perfectly normal tubers. Some pots have no tubers at all, only measly roots – onto the compost pile. Some very large tubers grow inside and outside the pot and we chop them off. And some have one massive bundle ... [of] tightly wound-up tubers filling the entire pot” which sometimes even “busts the pot to pieces.”

Ralph leaves them all in their pots for winter storage, which means “there’s no washing and no dividing in the traditional sense.”

In spring, he empties the pots, “if only to see how they survived the winter. Maybe 15% shrivel up. Most of the others call for an executive decision: Those with only small tuber bundles go right back into the pot. If there’s a substantial bundle, chop it once or twice” and you’re good to go.

So doesn’t that sound easy? If you try it, please let us know how it works for you and if you have any additional tips. We always love learning from our customers!

May
1
2019

Natives Not Required,
Expert Says – “Just Grow Plants”

As I watched the bees feeding frenziedly on my winter aconites and Crocus tommasinianus this spring – long before any native plants were in bloom – I was reminded of the advice of an eminent British ecologist.

Ken Thompson, who was profiled in Gardens Illustrated last November, has spent most of his long career studying the relationship between gardens and wildlife. He says his work was inspired by Jennifer Owen who, in the course of 30 years spent cataloguing the wildlife in “her ordinary, neat, suburban garden,” found 2,673 species including several which were new to science. As Thompson notes, Owen’s work “showed that you don’t have to create a pretend version of a natural habitat in order to attract wildlife.”

“Gardens aren’t like any natural habitat and because of that people think they are inferior, but they’re not,” he says. “They’re just another kind of habitat. Yes, have a pond if you can, do without chemicals, and leave some piles of dead wood around, but hedges, flowers, and plants all create places to feed and places to rest, and that is all that wildlife needs.”

“My best advice for anyone concerned about wildlife is this,” he says in conclusion – “just grow plants. Creatures eat plants, or the nectar created by plants, and everything else eats the creatures. As long as you are growing plants, you are doing all right.”

So even though native plants are awesome, there’s no need to feel guilty about growing plants that aren’t – and the bees in my garden clearly agree with Thompson on this.

Apr
23
2019

Protect Your New Plants with Trash-Can Cloches

Here’s a simple tip to protect your newly-planted iris, dahlias, daylilies, and other young plants from rascally rabbits, squirrels, deer, and other pests. It’s from the “Great Ideas from Smart Gardeners” column that’s in every issue of one of our favorite magazines, Garden Gate.

“Anna Ellenberger discovered some great plant protectors at her local dollar store: Wire mesh trash can baskets.

“They’re 10 inches tall and wide and available in either black or white. The size works great for setting upside down over her seedlings and small plants to keep critters from munching their new leaves, and the black color blends into the surroundings better than the white.

“Anna suggests poking small stakes through the mesh to keep the trash can in place. [You could also use u-shaped landscape-cloth pins.] When they aren’t in use, they stack up neatly for storage.”

Apr
10
2019

A Head Gardener’s Tips
for Growing and Enjoying Glads

I learned something new recently: “When cutting gladiolus, it is always best to remove the top bud, which often results in more flowers in the stem opening to their full potential.”

So says head gardener Tom Brown of Parham House and Gardens in Sussex. Here’s some other helpful advice he offered in an excellent article in the July 2018 Gardens Illustrated.

“Gladiolus are relatively easy to grow,” Brown writes, “and as the corms are so inexpensive you can afford to use them as annuals, meaning you can experiment with different colors and styles from one year to the next.”

‘Starface’

If you don’t want to buy new ones every year, they can also be dug and stored or – depending on your hardiness zone – “mulched heavily in sheltered, free-draining areas” To try that, cut the stalks down after frost, “cover the clump with a plastic bin liner [storage tub] to keep the corms dry, and mulch liberally with compost.”

Abyssinian glad

Although Brown notes that many sources recommend planting glads earlier, he prefers “waiting until at least May” – again depending on your hardiness zone – “when the soil has warmed and the chance of frosts faded.” For a longer bloom season, he recommends “staggering your planting through May and June at fortnightly intervals.”

If you’re growing them for cutting, “you should be able to squeeze 60 to 100 corms into a square meter” which means planting them roughly four inches apart. To grow them intermingled with other flowers, Brown removes “a spade’s width and depth of soil” and then sets “five to seven corms at the base of the hole.”

‘Atom’

Brown says that planting corms about ten inches deep gives them “consistent moisture and temperature so the flowers need less staking.” Smaller glads like ‘Atom’, ‘Starface’, and the Abyssinian glad often need no staking, while full-size glads “simply need four stakes in the corners of the clump and then string around the perimeter and a few pieces in between.”

Now doesn’t that sound easy? To give these tips a try and “indulge your garden and your vases with bold and beautiful spikes,” why not order a few glads now for April delivery?

Nov
10
2018

Fall Tips for a Healthier, More Beautiful Garden

Investing a little time in your garden now will pay big dividends in the year ahead, so here’s our seasonal guidance for improving your garden’s health and beauty – and increasing your garden joy:

how to clean up iris and peonies to protect them from borers and mildew,

how to dig and store dahlias, glads, tuberoses, rain lilies, and crocosmias (pictured here, freshly dug),

how to plant tulips, daffodils, etc. in outdoor containers,

how to force bulbs indoors for winter bloom.

For more, check out the 39 other links at our complete Planting and Care page, or call or email us. We want to help!

Oct
16
2018

For Better Peonies, Cut and Destroy Foliage Now

Peonies are rarely troubled by pests or diseases, but here’s an easy, poison-free way to make sure yours stay that way. We do it every fall.

1. Don’t wait. Cut them down early enough that the leaves are still green. If you wait until they’re dry and brittle, they’ll be much harder to clean up – and disease organisms can over-winter on any scrap that’s left behind.

2. Start with hedge-clippers so you can cut a lot of stems at once. Chop them off a few inches above the ground, and pile the foliage to the side.

3. Follow up with pruning shears to cut off the remaining bits of stem as close to the ground as possible – being careful not to injure the pink buds of next year’s stems which are at or near the soil surface.

4. Bag all leaves and stems and throw them in the trash. DO NOT COMPOST. Your goal is to leave virtually nothing behind that disease organisms can over-winter in.

5. Sterilize your tools by dipping or rubbing them with bleach or alcohol before going on to the next peony.

That doesn’t sound so bad, does it? And remember, healthy peonies bloom more!

Sep
19
2018

Good News about the Red Lily Leaf Beetle

When my sister and her family visited us from Massachusetts this past summer, my brother-in-law had some exciting news – after years of being plagued by red lily leaf beetles, he’d seen very few in their garden this year. The parasitic wasps seem to be working!

If these voracious beetles aren’t in your garden yet, they’re on their way. They first appeared in Massachusetts in 1992 and have since spread throughout New England and into New York, Pennsylvania, Michigan, Wisconsin, Iowa, and Washington.

In an attempt to control the beetles, researchers at the University of Rhode Island have released three species of tiny parasitic wasps. Two of these have slowly spread throughout New England, and it looks like they’re finally making a difference in my brother-in-law’s garden.

To learn more, see Margaret Roach’s excellent interview with Lisa Tewksbury of the Rhode Island University Biological Control Lab at AWayToGarden.com/controlling-lily-leaf-beetles-u-rhode-islands-lisa-tewksbury/.

And if you’re looking for a beetle-resistant lily, Tewksbury highly recommends ‘Black Beauty’. Although adult beetles may feed on it a little, she says, the larvae never do because eggs laid on it just die.

Sep
11
2018

The Best Water for Your Garden – in 1686

Water is an essential part of life – especially the life of gardeners. If you spent too much time this past summer dragging the hose around like we did, this excerpt from John Evelyn’s 1686 Directions for the Gardener at Says Court is for you.

“The best water,” Evelyn wrote, “is from rivers and running streams [rather than from a well or spring] so it be not too lean and cold.

“That which is always standing or shaded corrupts and is not good, but the water of ponds, and wherein cattle soil, is excellent, [and] rain water has no fellow.

“If water be too thin and poor, enrich it with the dung of sheep or pigeons by hanging a basket full of it into the water and letting it steep. Cow dung is also profitable. [However] water over-dunged brings a black smut on orange leaves, etc.

“If you be necessitated to use cold raw spring water, let it stand a while in the sun, and therefore keep always ready an infusing tub or vessel. Four gallons of heated water qualifies 20 gallons to milk-warm.”

Who knew water could be so complicated, eh? But as you may have already discovered – and Evelyn’s gardener probably wanted to tell him – you don’t have to do everything perfectly to have a wonderful garden. Hopefully yours made it through the summer just fine, even if you didn’t water it with milk-warm, dung-enriched river water.

Aug
29
2018

Learning from You:
Are Peonies Really Rabbit-Proof?

‘Nick Shaylor’ – rabbit food or not?

Until a few years ago I don’t think I’d ever seen a rabbit in my garden here in the center of Ann Arbor, but now they’re everywhere. They devoured my glory-of-the-snow this spring, and my neighbor says they’re why so few of our self-sowing larkspur bloomed this summer.

Peonies, however, are not one of their favorites, according to UK nurserywoman Claire Austin who’s been growing a huge collection of them ever since her father, the famed rose breeder David Austin, gave them up for roses in the 1980s.

“Did you know that peonies are rabbit-proof?” she writes in the May 2018 issue of Country Living. “If you have rabbits that like nothing better than to nibble from your borders, get planting peonies! Rabbits do not like the taste . . . and won't be tempted to snack on their roots, stems or blooms.”

But Claire gardens in Wales, and we’re wondering if what she says is also true for American rabbits. A few stalks of my peonies were chewed on for the first time this year, and I blamed the rabbits. It was minor damage, but I’m still wondering – do the rabbits in your garden leave your peonies alone?

Jul
24
2018

Too Hot? Too Dry? This May Help

If you’re enjoying a cool rainy summer, lucky for you!

Unfortunately much of the country is once again suffering through high heat and low rainfall. (When even the weeds are wilting, as in the photo here from my neighbor’s yard, you know it’s bad!)

It’s a topic we’ve addressed frequently in recent years, so rather than write a whole new article about it, here are some links to our Weather and Hardiness archives that we hope you’ll find useful – and maybe even a little bit “cooling.”

“Hot, Dry Summer: Is it Bad for Bulbs or Good?” (Aug. 2016),

“Learning from California: Gardening with 28% Less Water” (Oct. 2015),

“Hot Summer = Dahlia Hell” (Aug. 2012),

“Got Drought? Bulbs Are Built for It” (Aug. 2011),

“High Heat Stresses Your Bulbs, Too” (Aug. 2010).

Jul
3
2018

Propagating Hyacinths in 1896 and Today

Daffodils, tulips, and most other bulbs multiply naturally underground by producing offsets or daughter bulbs. Roman hyacinths do, too, but – after centuries of breeding – traditional garden hyacinths multiply so slowly on their own that bulb growers long ago developed ways to speed up the process.

The techniques described below by Liberty Hyde Bailey in his 1896 Nursery Manual would have been familiar to bulb-growers a century earlier and are still standard practice in the Netherlands today.

Bailey starts by explaining that “bulbels are often produced by an injury to the bulb. Growth of stem and leaves is more or less checked and the energy is directed to the formation of minute bulbs.” It’s the bulb’s natural reaction to injury that growers take advantage of in multiplying hyacinths.

“The favorite method is to make two or three deep transverse cuts into the base of the bulb [image 1]. The strongest bulbs should be chosen, and the operation is performed in spring or early summer, when the bulb is taken up.”

In another method, “the bulbs are hollowed out from the underside for half or more of their depth [image 2]. This operation is sometimes performed later in the season than the other, and precaution should be exercised that the bulbs do not become too moist, else they will rot. . . .

“The mutilated bulbs are stored during summer, and are planted in fall or spring. The wounded bulbs produce very little foliage, but at the end of the first season the bulbels will have formed. The bulbels are then separated and planted by themselves in prepared beds.

“Several years are required for the bulbels to mature into flowering bulbs. Some of the strongest ones may produce flowering bulbs in three years, but some of them, especially those obtained from the hollowed bulbs, will not mature short of six years.”

Could you do this at home? Of course – and now’s the time for it. If you do, please share your story (and photos) with us. Good luck, and have fun!

May
17
2018

Perennial Companions for Tulips – and ‘Thalia’

Although “tulips on their own can look spectacular,” writes UK garden designer Kristy Ramage in the April 2017 Gardens Illustrated, “I prefer to grow them more sparsely in combination with perennials, where the emerging leaves and a few early flowers are a foil for the shapely heads of the tulips.”

Kristy especially likes growing tulips “through mounds of soft foliage” such as that of columbines, meadow-rue (Thalictrum), Jacob’s ladder (Polemonium), hardy geraniums, and Anthriscus sylvestris ‘Ravenswing’, “a variety of wild chervil whose “ferny, copper-colored foliage . . . tones with the dark tulips and sets off the light tulips beautifully.” (Sadly for us here in zone-6a Ann Arbor, ‘Ravenswing’ is hardy to zone 7 and warmer only.)

She also highly recommends three of our favorite heirlooms for planting with perennials:

‘Apricot Beauty’ tulip – “Named in 1953, this lightly scented, softest salmon-rose tulip is vintage in more ways than one – imagine silk lingerie from the 1920s and you have this Single Early tulip to a tee.”

‘Columbine’ tulip – “Exquisite and rare, a ‘broken’ tulip of the type that was prized by the English florists’ societies of the early 19th century. It opens to a wide cup, displaying black anthers inside.”

‘Thalia’ daffodil – “I wouldn’t be without ‘Thalia’ somewhere in a garden. The form and color of this daffodil is so good it’s impossible not to be charmed. Introduced in 1916, it has been deservedly popular ever since for inter-planting with other bulbs or planting in drifts in a woodland.”

This spring, before your perennials reach their full-size, why not mark a few spots where a handful of tulips or ‘Thalia’ would look fabulous next spring– and then order now to make sure you’ll get them!


Apr
6
2018

Rita’s Easy Way to Get
Your Dahlias Eyed Up and Sprouting

You don’t have to start your dahlias indoors, but it can be fun – and reassuring if you’re new to dahlias. Here’s how our long-time office manager Rita Bailey does it.

Getting started – a tuber eyes up in a ziplock bag.

First of all, if you don’t see any eyes on your tubers when they arrive, don’t worry. This is perfectly normal. And if you do see eyes, you can skip right to step 4.

1. Start a month or even six weeks before your area’s last frost date. Find yours at almanac.com/gardening/frostdates.

2. For each tuber you’ll need some potting soil, a zip-lock bag, and a clear plastic deli container. Any size is okay as long as the tuber fits, Rita says, since it won’t spend much time in either.

Making progress – tiny white feeder roots appear.

3. Put some moist (but not soggy) potting soil in the bag, lay your tuber on it, and close the bag most of the way. Set it someplace warm (room temperature is fine) and bright (but not in direct sun), and keep an eye on it.

4. Within a week or two you’ll see eyes – little purplish or pale bumps like the eyes of a potato – emerging from the crown just below the old stem. Poke a drainage hole in the bottom of the deli container, fill it with damp potting soil, set it on a saucer (or in a shorter deli container, as in the photo below), and plant your eyed-up tuber with the crown covered by about an inch of soil.

Success! Your sprouted dahlia is now ready to move to a sunny window.

5. Keep it warm. Within a week or so, small white roots will begin to show at the sides of the container. Enjoy that sign of progress as you wait for the first sprout to emerge above the soil which, according to Rita, sometimes takes as long as two more weeks.

6. Once you see a sprout, give it as much light as possible and gently shake the container once or twice day to help strengthen the new growth.

7. As your last-frost date approaches, get your dahlia acclimated to outdoor conditions by hardening it off. This means setting it outside for a short period of time every day. Start with an hour or so in a sheltered spot and gradually increase the time and exposure until your plant is tough enough to spend all day in full sun.

8. When it’s hardened off and the last-frost date is past, gently remove it from the container and plant it outside, burying the tuber a little deeper than it was in the container. Water it well and enjoy!

Feb
23
2018

Garden Record-Keeping: Nancy’s ProClick Solution

Although keeping notes on your plants – their names, how to take care of them, when they bloom, and so on – can be helpful and even fun, it can quickly turn into a challenging mess.

But here’s a great tip from our good friend Nancy McDonald, as reported by Cathy Egerer in the Dec. 2017 e-newsletter of the Historic Iris Preservation Society.

Nancy, believe it or not, “has about 1750 irises in her care. She keeps them in a master Excel file on her computer, and brings printouts of the file to the garden where she can make notes.

“‘I needed something that would stand up to the wind, and sheets simply tore right out of a three-ring binder,’ she explains. ‘Clipboards were unwieldy and the wind would catch papers and tear them off. Then I found a system called Pro-Click, which allows me to print right on perforated sheets and bind them myself. The sheets flip 360 degrees and I can easily open the bindings to add and remove sheets, and the paper doesn’t tear out of the binding. I haven’t chased a paper across the field since I started using it.’

“ProClick supplies are readily available online and at office suppliers. A pre-packaged presentation kit comes with 50 sheets of perforated paper, two clear front covers, two black back covers, and two reusable spines, all for less than ten dollars.”

Dec
27
2017

Warm Winter Woes:
Iris “Lightbulbs” and Scanty Bloom

Warmer than usual winters can cause all sorts of problems for plants, including bearded iris. In a recent post at the American Iris Society blog, World of Irises, Bonnie Nichols of zone-8a Dallas explains:

Warm Winter Woes: Iris “Lightbulbs” and Scanty Bloom – www.oldhousegardens.com

“In December [last year] when the Christmas Day temperature was 82 degrees ... we knew the iris bloom season was in jeopardy. And, it didn’t get better when on January 31 the high was 79 degrees.

“When I saw various bearded irises blooming in December and January, I asked friends if they thought it was rebloom or what would have been our spring bloom. We all had no idea. In April, we knew [it] was the ‘spring’ bloom because we ... had no additional bloom. Maybe 20% of tall bearded irises bloomed....

“We saw more than normal increases on some of the plants because they did not use their energy to bloom. On other plants we noticed something that we had not had much experience with – ‘lightbulb’ rhizomes. Lightbulbs are rhizomes with no increases and the roots wither away.... The rhizome increases in size and twists slightly as if it is pushed out of the ground. [If it blooms] the stalk comes up in the middle of the fan and dies back quickly. The rhizome eventually dries up and dies also....”

Commenting on Bonnie’s post, Phil Williams offered an alternative explanation: “Strong root growth is what produces good bloom here. Makes me wonder if the prolonged heat [in summer and fall] might have created a false dormancy ... and the plants did not root deeply.”

Either way, warmer temperatures are the culprit. Is that global warming? Bonnie says she’s not sure but “I’m beginning to believe it is.”

Dec
13
2017

Three Great New Books:
Peonies, Bugs, & Pioneer Gardening

Three Great Books for Giving and Getting – www.oldhousegardens.com

Peony: The Best Varieties for Your Garden – This book is so new that Amazon isn’t even shipping it until later this month, but I got a copy Monday and couldn’t wait to tell you about it.

It’s definitely “a stunner,” as co-author David Michener of the University of Michigan Peony Garden told me, with page after page of glorious photos, many by co-author Carol Adelman of Oregon’s Adelman Peony Gardens. After chapters on peony history and origins, peony types, gardening with peonies, and peonies as cut flowers, most of the book is devoted to mouth-watering close-ups and short descriptions of nearly 200 peonies.

Although I wish there were more heirlooms in it, David and Carol have put together a line-up that’s impressively diverse. Most are herbaceous peonies, but there are plenty of intersectional and tree peonies, too, all dating from 1824 to 2015, and the incredible range of colors and forms is sure to have you ooo-ing and ahhh-ing. The book’s price is impressive, too – just $19 at Amazon. So what are you waiting for?

Three Great Books for Giving and Getting – www.oldhousegardens.com

The World of Laura Ingalls Wilder: The Frontier Landscapes that Inspired the Little House Books – Before she was a famous author, Marta McDowell was a customer of ours. (That's her in the photo below, visiting OHG this past September.) I loved her first book, Emily Dickinson’s Gardens, published in 2004, and since then she’s written three other gems: Beatrix Potter’s Gardening Life, All the Presidents’ Gardens, and now this one.

Three Great Books for Giving and Getting – www.oldhousegardens.com
Marta (right) at OHG with Vanessa (center) and Arlene

You don’t have to be a fan of the Little House on the Prairie books or TV series to enjoy it. The illustrations – antique images, original artwork from the books, and historic and modern photos – drew me in immediately, and Marta’s writing reads more like a conversation with a friend than a dissertation. The Wilders homesteaded in a half dozen states, from New York to South Dakota, and their story is more about growing food than flowers, as well as the untamed natural world they lived in.

At the end are chapters on “Visiting Wilder Gardens” and “Growing a Wilder Garden” today, and then just before the index there’s my favorite photo: a snapshot from 1962 of Marta’s family standing in her great-aunt’s backyard – “the flower garden that I imprinted on” – next to a big beautiful swath of tiger lilies.

Three Great Books for Giving and Getting – www.oldhousegardens.com

Garden Insects of North America, second edition – I got a copy of this book for my birthday recently, and it’s even better than I expected. First of all it’s BIG: 704 pages, weighing a hefty five pounds. It’s so well bound, though, that it opens flat for easy reading, and the cover seems so durable that I won’t hesitate to take it with me into the garden.

Then there are the photos: 3300 of them, all in full color, and helpfully organized into chapters such as “Insects That Chew on Leaves and Needles.” I admit my first reaction to them was “gross!” Most bugs, after all, aren’t as photogenic as the caterpillar on the cover, and it’s daunting to see page after page of damaged plants. But before long I was discovering insects I’d seen before but didn’t know what they were – such as the tiny, mosaic-patterned ailanthus webworm moth – and I realized this book is going to be both useful and fun.

Superstar garden blogger Margaret Roach recently called it “a must for every gardening household,” and I couldn’t agree more. One caution, though: be sure to get the brand-new second edition which is bigger and better than the 2004 original.

Nov
30
2017

Bulbs in Winter: Tips for Forcing, Tips for Storing

Bulbs in Winter: Tips for Forcing, Tips for Storing – www.OldHouseGardens.com

FORCING is fun, and end-of-season bulbs are often deeply discounted at local garden centers – so why not try blooming a few indoors this winter? Some are easy enough for children, while others require more finesse. For inspiration and tips, see our Forcing Bulbs How-To page and our Forcing Bulbs newsletter archives.

STORING tender bulbs like dahlias, glads, and tuberoses is even easier (although please remember that it’s also fine to just let them go). For our expert advice, see the “Winter Care” sections throughout our spring-planted Planting and Care page.

Nov
22
2017

How Bulbs Plant Themselves

How Bulbs Plant Themselves – www.OldHouseGardens.com

Nature is amazing, as every gardener knows.

For example, you’ve probably noticed that seed pods can form on your tulips, lilies, and other bulbs if you don’t deadhead them after flowering – but how do those seeds end up as bulbs six or eight inches underground, without a gardener to plant them there?

The fascinating answer involves contractile roots, blue light, and – for tulips – the evolutionary pressure of marmots.

tulip seedpod

Canadian blogger Larry Hodgson explains it all at LaidBackGardener.blog/2017/09/20/how-bulbs-plant-themselves/.

One caution, though: In an accompanying article, Larry recommends planting tulips a foot deep and says Darwin Hybrid and Viridiflora tulips often return best – but that’s not been our experience. For our tips on how to get your tulips to return and bloom year after year, visit oldhousegardens.com/HowToFall#Tulipa.

Oct
3
2017

Protect Peonies and Iris with an Easy Fall Clean-Up

Protect Peonies and Iris with an Easy Fall Clean-Up – www.OldHouseGardens.com

For healthier plants and more flowers, give your peonies and iris a simple fall clean-up.

PEONIES – Although peonies are generally care-free, they can be afflicted by powdery mildew (pictured here) and other fungal diseases.

To prevent spores from overwintering, cut peony stems as close to the ground as possible, carefully bagging everything as you go, and dispose in the trash instead of composting. For best results, do this earlier rather than later, before the leaves dry up.

IRIS – Fall is also the best time to control iris borers. Borers hatch in spring from eggs laid in fall on iris leaves and anything similar that’s close by. To destroy them, simply wait until after a hard frost kills the adult moths and then (a) cut back all leaves to a couple of inches and (b) remove, bag, and trash – don’t compost – the clippings and any debris or mulch that’s near the plants.

Simple, right? And your plants will reward you!

Sep
28
2017

Two Great Tulips Overcome Deer, March Planting

Two Great Tulips Overcome Deer, March Planting – www.OldHouseGardens.com

Heirloom bulbs are survivors, but even we were surprised by these two reports:

Here’s what our good customer Marianne Schmidt of zone-5b Stuyvesant, NY, had to say about one of our most fragrant tulips – although please note that we can’t guarantee it will work for you:

“Last spring the deer devoured all of my tulips EXCEPT ‘Generaal de Wet’. I don't know if it was the fragrance or color that turned them off, but this year I'm pinning all of my tulip hopes and expectations on this beautiful tulip!”

And though we’d never recommend planting tulips THIS late, we were happy to get this news about one of our oldest tulips from our long-time customer Tara Fitzpatrick of zone-6a South Hadley, MA:

“Testimony for your ‘Couleur Cardinal’ – I forgot a bag I had intended to force inside in the basement fridge all winter. I found and planted them in the garden in March during a thaw, and they bloomed perfectly in May!”

Sep
14
2017

Peonies and “Pumpkin Spice Latte Gardening”

Pumpkin Spice Latte has returned, and coffee drinkers everywhere are rejoicing.

Peonies and “Pumpkin Spice Latte Gardening” – www.oldhousegardens.com

So why isn’t this wildly popular drink offered year-round, asks Joseph Tychonievich in the current issue of Michigan Gardening. Because then, he says, “we’d drink it, grow tired of it, move on, and forget about it. The fact that this special drink only comes around once a year makes it special.”

And we gardeners can learn from this, Joseph says. “Often in the garden we gravitate to things that bloom or look good for as long as possible,” but “gardens aren’t some math problem. . . . The really important harvest is not flowers or even food, but joy. So maybe it is time to step back a little from all of the long-blooming, forever-performing plants and embrace flowers that . . . instead inspire us with wild joy, anticipation, and glee.”

His top suggestion, we’re happy to say, is peonies – and we’re offering more than ever this fall! Although they don’t bloom forever, “for a few glorious weeks in late May or early June, they’ll positively cover themselves with huge, extravagant, powerfully fragrant flowers.”

“You'll look forward to that . . . all year long. As the buds swell, you'll check them each day. When they finally open, you'll sit next to them drinking in the rich scent. You'll cut armloads of them. . . . You may even throw a party in their honor.”

Of course “it doesn’t have to be peonies,” Joseph adds. “Find a plant that you truly love, that really thrives and performs in your garden, ignore the fact that it only blooms for a couple weeks in a year, and then plant them by the dozens and revel deeply in the sheer magic of their performance.

“Don't let anyone tell you they aren't practical. Gardening is about passion, not practicality. . . . Remember the lesson of the Pumpkin Spice Latte and keep some magic and anticipation in your garden.”

home-grown peony magic
Aug
30
2017

Protect Yourself from Garden Thieves

A long-time customer – who asked to remain anonymous – emailed us this sad report after reading our article “The Queen of Garden Antiques” in last month’s newsletter:

“While collecting garden antiques is a wonderful adventure, there is a sad downside. Our garden was burgled last summer with more than 20 garden ornaments taken, many of them antiques.

Protect Yourself from Garden Thieves – www.OldHouseGardens.com

“Someone had obviously cased the garden and knew what to take. They even went into my greenhouse and potting shed in search of portable items.

“Alas, I had a photograph of only one of the stolen pieces, taken for a garden tour brochure. Lesson learned. Everything will now be photographed and kept in a file along with all of the receipts, which I do have safely stored.

“Since then I have had a welder bolt some of my smaller urns in place, and though I refuse to consider security cameras, I have hung up signs up that say ‘Smile, you are on camera.’ We keep our six antique iron gates locked, along with the greenhouse and potting shed, and I am like a little old lady walking around with my ring of keys. Not a pleasant way to have to live.

“Forty-plus years of collecting, gone. And I will not be able to – or even want to – start replacing many of these lost treasures. They took a pair of cast-iron tulip urns, for example, that I loved. I saw a similar pair (pictured) offered recently for $4200. Mine were a bit smaller, but when I bought them years ago I probably spent less than $100 each.”

My condolences, friend! And here’s hoping that your heartbreaking story will be a wake-up call for the rest of us.

May
24
2017

New and Improved:
The “Bible” for Restoring Historic Gardens

Like most people, I never thought about plants and gardens having a history – until almost 40 years ago when I bought my first old house and walked out into the tiny yard eager to make it my own.

New and Improved: The “Bible” for Restoring Historic Gardens - www.OldHouseGardens.com

There behind the overgrown privet hedge, I discovered a few barely surviving plants, including a white, single-flowered peony. Suddenly I realized it wasn’t just my yard. Someone else had loved it before me. But who, and when? Was the peony ten years old, or 50, or 100? And what about the hedge?

Looking for answers proved frustrating at first. This was back in the dark ages – before Google. But finally I discovered this book by Rudy and Joy Favretti – or rather the original, 1978 edition of it – and I was no longer wandering in the wilderness.

I’ve been using and recommending it ever since, and as I say on the back cover of this updated and expanded third edition, “Bravo! A new edition of this indispensable work has been long overdue. It’s the original guide to researching and restoring American home landscapes, by the dean of American landscape preservation. For decades, savvy home-owners and museum sites have turned to it for guidance – and now, with its many updates and additions, it’s better than ever.”

Although the core of it is unchanged, Rudy and Joy have added illustrations and updated information throughout. Best of all are the additional examples from their long careers, including a page on the archaeological excavation that revealed the long-vanished, mid-1600s garden at Bacon’s Castle in Virginia.

If there’s an old yard you care about, Landscapes and Gardens for Historic Buildings is the book for you. It may not change your life the way it did mine, but it will certainly help you see any yard – and the wider landscape all around us – with new eyes.

May
16
2017

Extra Easy Growing
(and Storing) Dahlias in Buried Pots

If you haven’t planted your dahlias yet, here’s a simple way to grow and store them from our good customer Jenn Hovland of Fleur de Louise Flower Studio in Stillwater, Minnesota.

Extra Easy Growing and Storing Dahlias “In the Dry” – www.OldHouseGardens.com
dahlias stored in the basement

“For several years now I have stored my dahlia tubers ‘in the dry’ as they do in England,” Jenn wrote on her spring order. “I start by planting a new tuber in a 1 or 2 gallon plastic pot. I lay it flat near the top of the pot, cover it with just an inch of soil, water it once, and then leave it alone until sprouts emerge.

“When the weather warms up, I plant it outside, pot and all, with the pot buried about halfway and a stake pounded in the ground next to it. I always use black or green pots so whatever isn’t buried or hidden by other plants is still pretty much invisible.

“At the end of the season when frost blackens the foliage, I wait a few days, lift the entire pot, cut back the dead foliage, let it dry on my porch for a couple of days, and then put it in the basement and forget about it. In March or April when I notice new growth, I move it upstairs to a sunny window and it’s ready for the new season.

Extra Easy Growing and Storing Dahlias “In the Dry” – www.OldHouseGardens.com
‘David Howard’ starting to sprout

“By using this method, I've lost very few tubers to rot or drying out. Although it takes a little extra space to store the pots, it has worked very well for me.”

Wanting to know more, I emailed Jenn and she cheerfully answered all of my questions.

One-gallon pots seemed small to me, so I was surprised to learn that she sometimes uses even smaller ones. Pot size doesn’t seem to matter much because, although the tuber-cluster remains confined within the pot, its feeder roots grow through the holes in the bottom. When the pot gets crowded after a couple of years, Jenn divides the cluster and starts all over again.

Extra Easy Growing and Storing Dahlias “In the Dry” – www.OldHouseGardens.com
dahlias hardening off before pots are buried

During the winter she keeps the pots as dark as possible because light encourages sprouting. In March she starts checking for new growth, and when the first sprouts appear – this year in mid-April – she adds an inch of compost to all pots, waters them once, and moves them to a sunny window.

“Then in May,” she told me, “I take the plants outside to harden them off for a couple of weeks, bringing them in at night until they adjust to outdoor living. By mid-May they’ll be staying outside overnight, except when frost is predicted. I finally plant them in the garden around Memorial Day. By then they are quite large plants – which means they’ll bloom earlier.”

That sounds good to me, and I’m planning to give Jenn’s method a try. If you do, too, please let us know your results so we can learn from you as well!

Mar
22
2017

Try This at Home:
Multiplying Glads by Dividing the Corm

Try This at Home: Multiplying Glads by Dividing – www.OldHouseGardens.com

Even if your glad planting season is still months away, here’s a tip from expert Cliff Hartline that you can use whenever that happy time arrives.

Cliff writes my favorite section of the NAGC journal Glad World. It’s a Q & A column titled “Talk Radio,” and a while ago a reader asked, “I heard you can cut corms in two to multiply them. How do you do that?”

First of all, Cliff replied, it’s important to “make sure there are eyes and root nodes on both halves. The eyes go across the corm in only one direction. They are not like potatoes that have eyes everywhere. Peel the husk off before cutting, so you can identify the line of eyes.” Look for small, individual flaps of shiny husk that protect the eyes, or the emerging tips of the eyes themselves.

Don’t do this too early, though. “Without the husk, the corm will dry out quicker, so you need to do this close to the time of planting.”

“After cutting it, put powdered sulfur [available at garden centers or online] on the open wound. This helps seal the scar and protect the corm when it is planted.”

Before going on to cut another corm, sterilize your knife with alcohol.

If you’re feeling lucky, “you can even cut the corm into three or four pieces,” Cliff says, although “this increases the chance that it may not survive.” Even if you only cut it in half, there’s some risk involved, so we recommend you try it with inexpensive glads first (although not Abyssinian glads).

Good luck, have fun, and please let us know how it goes!

Mar
15
2017

Limber Up for Gardening with a Few Easy Exercises

Limber Up for Gardening with a Few Easy Exercises – www.OldHouseGardens.com

We’ve all been there. It’s the first beautiful Saturday of spring, you’ve spent hours blissfully working in the garden – and the next morning you’re sore all over and hoping you haven’t seriously injured yourself.

But it doesn’t have to be that way. Whether you’re heading out to the garden after a long winter off or just a long week at work, you can protect your body from pain and worse by doing a few easy exercises ahead of time.

Our friend Doug Oster recently posted some simple tips and a short video at his excellent Everybody Gardens blog. We hope you’ll give them a look and do your muscles, back, and joints a favor!

Feb
9
2017

Garden Tips for February:
Stored Bulbs, Forced Bulbs, and Getting Ready

Garden Tips for February: Stored Bulbs, Forced Bulbs, and Getting Ready – www.OldHouseGardens.com

Even if your garden is buried in snow, here are some helpful tips for now or soon:

Check on Stored Bulbs – If you stored any tender bulbs last fall, it’s important to check on them periodically. Problems discovered early can often be remedied, but if you ignore them until planting time, everything may be dead. Learn more at “Check Stored Bulbs Now.”

Don’t Skimp on Chilling – If your forced bulbs try to bloom before the stem has lengthened, it’s most likely they haven’t had enough chill-time at 48 degrees or less. Returning them to cold storage now could help. Learn more at our Forcing Bulbs page.

Loosen Matted Leaves – Small, early bulbs often emerge much earlier than seems possible, especially in warm micro-climates. Matted leaves and winter mulch can hamper their growth, so get out there early and gently loosen or remove it.

Fertilize Before They Emerge – Although it’s always best to be guided by a soil test, if you haven’t fertilized in a while, you may want to do so this spring. It’s easier and safer if you scratch it into the surface before bulb foliage emerges. Learn more at “Fertilize Early.”

Get Tools and Supplies Ready – Check your garden tools and supplies now, before the mad rush of spring. Buy more fertilizer, twine, stakes, potting soil, animal repellant, gloves – and what else will you need? Be sure you know where all of your tools are, and maybe even treat yourself to a new one.

Order More Bulbs – Of course! See all of our spring-planted treasures at OldHouseGardens.com/Spring.

Nov
10
2016

Do It NOW: Protecting Iris and
Peonies, Multiplying Glads and Dahlias, Etc.

Do It NOW: Protecting Iris and Peonies, Multiplying Glads and Dahlias, Etc. – www.oldhousegardens.com
iris borer

With warmer-than-usual weather in much of the country, it’s still a great time to do some of the little things that will pay big dividends in your garden’s health and beauty next year.

Click these links for helpful tips from our newsletter and website:

how to do a simple fall clean-up to prevent iris borers and eliminate peony mildew,

how to get free bulbs by digging and storing your glads (later is better), dahlias, and crocosmia,

how to store – even without digging! – tuberoses, rain lilies, and crinums,

how to safely plant spring-blooming bulbs in outdoor pots,

how to force bulbs indoors for winter bloom – just add water!

For even more bulb care tips, check out the 47 other links at our complete Planting and Care page. Your garden will thank you!

Oct
27
2016

Bulb Protection from the Dollar Store

Bulb Protection from the Dollar Store

Although some bulbs are rarely bothered by animals (see our complete list here), others are quite tasty.

If, like us, you can’t live without tulips, lilies, and other animal favorites, here’s a tip from fellow gardener Louise Heern in the August issue of Fine Gardening:

“Trying to garden in the mountains of Colorado is no easy task. Some plants may be deer or rabbit resistant, but voles and pocket gophers don’t care what kind of roots they eat.

“To protect plant roots from these burrowing critters, I buy wire baskets from the dollar store and sink them in the ground, leaving an inch or two above the soil to prevent voles from coming in over the top. I then plant the root-ball inside the basket, back-filling with soil to the appropriate level. The basket rim can be hidden with mulch if your plant doesn’t cover it.

“Wire baskets can also be turned upside down and secured with U-shaped pins to protect new seedlings from rabbits and chipmunks.”

Oct
20
2016

Can Landscape Cloth
Turn ALL Glads into Perennials?

Can Landscape Cloth Turn ALL Glads into Perennials?

Here in zone-6a Michigan we leave our Byzantine, ‘Boone’ (pictured), and ‘Carolina Primrose’ glads in the ground every winter and they come back and bloom the next year just like any other perennial.

But wouldn’t it be great if ALL glads were that hardy? A recent article in the NAGC journal Glad World makes me think that might just be possible.

In his always excellent “Talk Radio” column, Cliff Hartline says that glad grower Bert Blanton “is noted for NOT digging his glads yearly,” even though he lives in zone-6b Missouri. Bert used to protect his glads in winter with a thick mulch of straw, but he says it “always blew around and I was constantly replacing it.”

So three years ago he tried landscape cloth instead, and it worked so well that he’s been using it ever since.

“I plant my rows six feet apart,” he says, “and cover my aisles and rows with landscape cloth, putting the seams right over the rows.” He pegs it down with wire landscape-cloth pins (also called sod staples), and then rolls it back in the spring.

The only problem? After three years of no digging, “I now have jillions of flowers,” Bert says. “I have about 20 spikes to a foot, and the rows have expanded themselves to 15 inches wide. I am getting so many spikes, it is more than I can sell at the Farmers Market or give away. My spikes are larger than anyone else’s, so I sell them for $2.00 each.”

We’re going to experiment with Bert’s technique this winter, even though our gardens are half a zone colder than his. If you try it, too, please let us know how it works for you and we’ll share our results here.

Sep
29
2016

Forcing Crocus on Pebbles like Paperwhites

Forcing Crocus on Pebbles like Paperwhites – www.OldHouseGardens.com

Here’s a cool idea I stumbled upon recently in a 1957 book called Bulb Growing for Everyone.

I’d seen images like this one in catalogs from the late 1800s and early 1900s, but since all sorts of implausible things are pictured in catalogs old and new, I never gave it much thought. But the well-known Dutch bulb-grower Johan Frederik Christiaan Dix explains how it’s done:

“The receptacles in which we place [crocus] must not be so deep as those required for other bulbs, and they require far more attention insofar that a more gradual transition from a dark, cool place to a light, heated room is necessary.

“They should not be taken out into the light until the noses are fully two inches long and . . . they must on no account be brought into a hot temperature, otherwise the bulbs will shrivel up. So keep them cool until the buds rise from among the leaves. This is the moment to bring them into the room or onto a warm windowsill.

Forcing Crocus on Pebbles like Paperwhites – www.OldHouseGardens.com
‘Vanguard’ crocus

“Most crocuses cannot be expected to flower before the end of January. . . . There is one exception, however, the crocus ‘Vanguard’ which begins to flower as early as New Year’s Day, and even at Christmas.”

We plan to give it a try – with ‘Vanguard’, of course. We’ll start the bulbs as soon as possible because they need months to root and grow, and we’ll store them in the refrigerator to make sure they stay below 48° but above freezing. If you try it, too, please let us know how it goes!

If you’d rather force something easier – from fragrant hyacinths to snake’s-head fritillaries – see our complete how-to at OldHouseGardens.com/ForcingBulbs.

Aug
17
2016

Hot, Dry Summer: Is it Bad for Bulbs – or Good?

It’s been a hot, dry summer in much of the US. In fact, it’s been so bad in Maine that we had to drop a whole page of rare glads from our catalog because our grower there is worried he won’t have any corms to share with us!

Hot, Dry Summer: Is it Bad for Bulbs – or Good? – www.OldHouseGardens.com

But how will it affect your bulbs? First some good news:

Bulbs are one of Nature’s clever survival strategies. They’re essentially underground bunkers where the plant can stay cool and store moisture. And once the weather improves, bulbs often bounce back better than most plants.

Some bulbs even prefer dry summers. Tulips and hyacinths, for example, evolved in parts of the world with little to no summer rainfall. That means yours may bloom better next spring than they usually do – at least if you’re in the eastern half of the country where normal summers are rainier.

And some bulbs like it hot. As long as you’ve kept them well watered, your tuberoses, rain lilies, crinums, and cannas are probably thriving this summer, and we hope you’re enjoying them!

On the other hand, dahlias often struggle or fail in hot summers. That’s because they’re native to the highlands of Mexico where days can be hot but nights are much cooler. When nights in your garden stay warm, growth will slow or stop and they may even die. If you water them too much when growth has stalled, they may rot underground.

Hot, Dry Summer: Is it Bad for Bulbs – or Good? – www.OldHouseGardens.com
heat-tolerant ‘Deuil du Roi Albert’

Don’t despair, though! If you can just keep your dahlias limping along until temperatures cool, they’ll kick back into gear and bloom gloriously until frost. And for dahlias that can handle warm nights better, look for “heat-tolerant” in our descriptions – although even these have their limits.

Glads in hot summers can be attacked by tiny, almost invisible sucking insects called thrips. Thrips proliferate when it’s hot and can leave glad leaves and blossoms mottled, or even prevent buds from opening. For tips on control, see oldhousegardens.com/Thrips.

Glads may also develop zigzag stems in hot weather as they sag a bit during the day and then grow upright at night when evaporation slows. To minimize this, keep them well-watered and avoid damaging their shallow, wide-spreading roots.

High heat also affects flower colors. Deep-colored lilies such as ‘African Queen’ may be paler, bicolor dahlias such as ‘Deuil du Roi Albert‘ may bloom temporarily as solids, and the rosy tones of ‘Kaiser Wilhelm‘ and others won’t develop fully until the weather cools.

This fall is expected to be warmer and drier than usual, too. Since most spring-blooming bulbs start growing new roots in late summer or early fall, keep their soil reasonably moist then, and be sure to keep the bulbs you plant this fall especially well-watered.

And try not to worry. Bulbs have been dealing with challenging weather for millennia. And there’s always next year – which, as every gardener knows, is one of the great things about gardening.

Jul
20
2016

Perennializing vs. Naturalizing:
What’s the Difference?

Perennializing vs. Naturalizing: What’s the Difference? – www.OldHouseGardens.com
naturalized Siberian squill (by Larry Hodgson, Laidback Gardener)

Although the words “naturalize” and “perennialize” are often used interchangeably, their meanings aren’t exactly the same – and it can make a big difference in the garden.

“Perennialize” means the bulbs will behave like perennials, coming back year after year and multiplying under-ground. “Naturalize,” on the other hand, means the bulbs will also multiply by seed, with little or no care, and as a result they usually spread further and faster.

Dutchman’s breeches

“The experience of one of my neighbors with Siberian squill helped me understand the difference,” wrote Karen Bussolini in the September 2013 issue of The American Gardener.

“For many years, the neighbor divided and replanted clumps of the tiny bulbs in the lawn, trying to create a blooming blue spring carpet. They spread slowly, producing a mass more akin to a bath mat than a carpet, despite having everything they needed – winter cold, good drainage, and dry conditions during dormancy.

“It turns out,” she concluded, “that what they lacked in order to naturalize was enough time for the seed to ripen. Once the family began mowing the lawn later in the season, they seeded abundantly.”

Grecian windflower

Almost any bulb can set seed, but here are the heirlooms we offer that will naturalize most readily – if they’re in the right spot with the right conditions: tommies (Crocus tommasiniaus), ‘Roseus’ crocus, Roman hyacinths, ‘Early Louisiana’ jonquil, coral lily, tiger lily (by stem bulblets rather than by seeds), rain lilies, and a whole slew of our fall-planted diverse bulbs: purple-headed garlic, Grecian windflower, Turkish glory-of-the-snow, Dutchman’s breeches, winter aconite, antique freesia, snake’s-head fritillary, snowdrops, Spanish bluebell, Southern grape hyacinth, silver bells, Siberian squill, and sternbergia.

If you’ve had success with other heirloom bulbs naturalizing happily by seed in your garden, please let us know and we’ll share the good news here with our readers.

Jun
22
2016

A Few Simple Bulb Tips for June

Dead-Heading Iris and Peonies – Cutting off faded blooms redirects your plants’ energy from seed-making to future growth and bloom. Cut down iris bloom-stalks (not leaves alone) as close as possible to the rhizome, but cut back peony bloom-stalks no more than is needed to make the plant look good.

Growing Bulbs in Pots – Container gardening is great, but it’s not the same as growing bulbs in the ground. For the best results, see our Bulbs in Pots page.

Multiplying Your Rarest Tulips – In most gardens, the best way to give your rarest tulips the dry summer rest they need is to dig them up after the foliage yellows and store them in a dry, well-ventilated place – maybe hanging in mesh bags from the rafters in your basement or garage where they’ll be safe from mice and chipmunks, too. Then put a note on your calendar so you don’t forget to replant them in the fall!

A Few Simple Bulb Tips for June – www.OldHouseGardens.com

Staking Dahlias – For a bushier plant, pinch out the center shoot after three or four sets of leaves develop. Although dahlias grow upright and may look like they don’t need support, they do. Learn more.

Controlling Red Lily Leaf Beetle – The earlier you find and destroy these pests – which are currently expanding beyond New England – the better. Learn more.

Jun
17
2016

Save the Bees – In Your Own Backyard, Neighborhood, and City

Just in time for National Pollinator Week, June 20-26, our bee-keeping neighbor and friend Eileen Dickinson knocked on our door asking, “Will you sign a pledge to make your yard pollinator-safe?”

Eileen – whose garden was featured in Country Gardens last year – explained that the Bee Safe Neighborhoods pledge offers various levels of commitment. The first and most important is to stop using any lawn or garden product that contains neonicotinoids – which are especially harmful to bees – or any other systemic herbicide or pesticide, since systemics are absorbed into the plant and poison the pollen and nectar that pollinators collect.

To learn more, visit the Bee Safe Ann Arbor Facebook page which has a lot of useful information about pollinators and gardening more safely, including a link to a “Grow Smart, Grow Safe” list of weed control products ranked from least to most hazardous.

Eileen also shared the good news with me that Ann Arbor has applied for certification as a Bee City USA community. “Launched in 2012, the Bee City USA program endorses a set of commitments for creating sustainable habitats for pollinators, which are vital to feeding the planet,” I learned at the organization’s website. “Communities across America are invited to make these commitments and become certified as a Bee City USA affiliate.”

I signed the Bee Safe pledge, and even if Eileen doesn’t make it to your door, I hope you’ll celebrate National Pollinator Week by pledging to make your yard a safer place for these critically important and vulnerable creatures.

Jun
15
2016

Fertilize Your Garden with . . . Lightning?

Like most gardeners, I’m a big fan of rain. But until I read a short article in the Ann Arbor News recently, I had no idea that lightning itself is also good for my garden.

Fertilize Your Garden with . . . Lightning? – www.OldHouseGardens.com

“Lightning is nature’s greatest fertilizer,” writes meteorologist Mark Torregrossa. “The air around us is 78% nitrogen. Nitrogen is the main nutrient in most fertilizers. But the nitrogen in the air is not usable by plants, until lightning strikes through it.

“Once the air is heated by lightning, two [atoms] of nitrogen are split apart. The single [atom] of nitrogen then joins with oxygen or hydrogen and is rained into the soil. Now it’s usable by plants. A lightning storm applies more nitrogen on lawns and crops than we could ever afford to buy.”

With Google’s help, I learned that lightning can briefly heat the air it passes through to 50,000 degrees F, almost ten times hotter than the surface of the sun. That enormous energy breaks up the nitrogen (N2), freeing the atoms to recombine into nitrate (NO3), ammonia (NH3), and ammonium (NH4). The latter two are also produced by nitrogen-fixing bacteria in the roots of the enormous Fabacaea or legume family, but some scientists believe that lightning is responsible for as much as 50% of the nitrogen available to plants.

May
25
2016

Making Your Peonies in Bouquets Last Longer

Lush and romantic, peonies are fabulous in bouquets. To get the most out of yours, here are some tips from Dr. Patricia Holloway of the University of Alaska, as quoted by Debra Prinzing in her 2013 Slow Flowers:

“‘Cut peonies during the coolest part of the day. Cut once you see the true color of the flower with one or two petals separating at the top [the “soft marshmallow” stage] – or any time after that. Then the flower will continue to open in your arrangement.’ If you cut prior to this stage the buds either will not open or they will be stunted. Fully-opened blooms can also be harvested, but their vase life is shorter. . . .

“Dr. Holloway also offers this commercial growers’ tip; ‘Once cut, your flowers should be chilled in the refrigerator for at least 24 hours and up to one week before putting them into a vase. That chilling very definitely extends vase life.’ Wrap the peonies in paper towels and lay them flat in the crisper drawer, away from the refrigerator’s other contents.”

We’ll also remind you that for future growth and bloom it’s best to leave as much foliage as possible on the plant. This is especially important during the first two years after planting, and in fact many experts recommend that you cut NO flowers the first year. We know how hard that can be, but your patience will be rewarded.

May
4
2016

Fish Tank Gravel for a Better Spring Garden

Have you ever looked at your spring garden and thought, “That spot needs a pop of color” or “I should plant more daffodils right there” – but then later everything has grown and changed so much that you can’t remember what you were thinking? Here’s a tip that will both help you find those perfect spots again at planting time and help you avoid disturbing any other bulbs that are growing nearby.

Right now, before spring is over and everything has changed, walk your garden with your smart phone or camera and a bag of fish-tank gravel. Snap photos of the areas where you want to add more flowers, and use the gravel – which comes in a variety of water-proof colors, from hot pink to subtle shades like green and brown – to outline the exact planting spots.

Later when you’re ready to order or plant bulbs, look at your photos to remember the places you had in mind and to see what your garden looked like in the spring. Then find the gravel outlines, plant your bulbs with confidence, and simply mix the gravel into the soil where it will virtually disappear.

The only hard part is you have to do it NOW, before spring has gone and faded from your memory – so get out there, and while you’re at it, enjoy your beautiful spring garden!

Apr
20
2016

Learning from You: Dahlias for Drought

Although the West Coast drought has eased a bit, we thought you’d be interested in this success story from our good customer Pat of zone-9bWC San Jose. We can’t guarantee it will work for you, but . . . .

“I grew some of your ‘Bishop of Llandaff’ dahlias last year and found them great for our arid climate. I planted them very deep, maybe a foot down, which is low enough for our clay soil to remain moist with almost no watering, if you can believe it. Maybe once a week.

“I followed the directions at your website and put the tubers at the bottom of the hole and then filled in soil little by little as the leaves emerged, which they did very quickly.

“My tiny garden on the west side of our garage gets a good five to six hours of blazing, direct sun and then light shade later in the afternoon. Since we’re in a valley and not near the ocean, nights are generally cool and dry. [OHG: This is exactly what dahlias love!] The plants wilted on the hottest days but they perked up afterward, as you’d see with tomatoes or potatoes.

“Thank you for letting me ramble on. No one in my family is interested. My neighbors like all the free flowers, though! I give quite a few away.”

Mar
10
2016

Garden Tips for Early Spring

Although it may be too late for you lucky souls who garden where spring is already well advanced, here are some tips for those of you in colder zones:

1. Crocus, snowdrops, and other bulbs start to emerge earlier than many gardeners realize, especially in warm spots where the snow melts first. Matted leaves and winter mulch can distort their growth, so get out there EARLY and gently loosen or remove it.

2. Rabbits and other animals love to eat crocus, so you may want to spray leaves and buds with a repellant the moment they emerge. Check to see if you have some on hand before you need it, because the animals won’t wait! Tulips and lilies are two other, later-emerging animal delicacies that you may also want to spray.

3. Very early spring is also one of the best times to scratch a little fertilizer into the soil above your bulbs. If you wait too long, particles tend to get lodged between the leaves at their bases where they can burn the tender new foliage. Early spring is also when bulbs need the fertilizer to fuel their rapid growth and bloom. Don’t overdo it, though, and remember it’s always good to be guided by a soil test.

4. Now is also a good time to wash any pots that you’re planning to use for starting dahlias or growing tuberoses, etc. Finish by sterilizing them for a few minutes in a mix of 10% bleach and water. Later when you’re scrambling to keep up with your burgeoning garden, you’ll be glad you did.

Feb
3
2016

Late Winter Tip: Check on Your Stored Bulbs NOW

If you stored any tender bulbs last fall, it’s important to check on them now. The longer they’ve been in storage, and the closer it gets to spring, the more vulnerable stored bulbs are.

KEEP THEM COOL – It’s often hard to keep storage temperatures down as the weather outside warms up. Colder temps are usually better for stored bulbs – just like the refrigerator is better for storing most vegetables – though you never want them to freeze. Warmer temps can lead to premature sprouting and the development of rot, mold, and disease.

 Seasonal Tip: Remember to Check on Your Stored Bulbs
Our bulbs in storage with a max/min thermometer and fan.

Monitor temperatures with a maximum-minimum thermometer. Opening doors or windows in your storage space whenever outdoor temperatures drop may help. Bulbs can also be stored in the refrigerator but remember that the air inside refrigerators is usually VERY dry, so adjust accordingly.

Although most stored bulbs can handle a wider range of temperatures, the ideal for glads and crocosmia is 35-45 F, for dahlias 40-45, and for tuberoses and rain lilies about 50.

ADJUST THE MOISTURE – If storage conditions are too damp – and especially if they’re also warm – bulbs will rot or develop mold, etc. On the other hand, bulbs that are too dry – especially dahlias – may dry out completely.

If you find condensation on the inside of storage bags or boxes, leave them open a bit to let excess moisture evaporate. On the other hand, if your dahlias are shriveling or feel unusually light, sprinkle a little water on them and whatever they’re stored in – coarse vermiculite, wood shavings, peat moss, etc. – and if you don’t already have them stored in plastic, do so. Check back in a few days and adjust as needed.

MAKE A BREEZE – Good air circulation helps prevent disease organisms from developing on bulbs which are stored in mesh bags (glads, crocosmia, and tuberoses). Add a small fan to your storage space, but don’t have it blowing directly on the bulbs, just moving the air around a little.

WATCH FOR SPROUTS – If you’ve stored your bulbs dry in their pots, start checking for new growth long before it’s warm enough to move them outside. A little sprouting is okay, but once it starts to advance, move the pot into your sunniest window and barely water it.

Remember that a pot of tuberoses will usually bloom for a second year if watered and fertilized well, but by the third spring the bulbs will be too crowded to bloom well. Report them then, composting the ones that bloomed previously (since each individual bulb blooms only once) and replanting the largest of the daughter bulbs.

KEEP IT DARK – Light is one of the cues that spurs bulbs into growth, so keeping your storage space as dark as possible will help keep your bulbs happily asleep until it’s time for another year of awesomeness.

Learn more in the Winter Care sections of our Spring-Planted Bulb Care page.

Jan
7
2016

Warm Winter? Relax! Bulbs are Built for It

“My bulbs are already coming up! What should I do?” We’ve been hearing that from a lot of customers recently.

The good news is that most plants are tougher than you might think, and they’ve been evolving to cope with erratic weather for millennia.

Most fall-planted bulbs, for example, require a certain number of hours below 40 degrees or so in order to produce enough gibberellic acid to allow the leaves and flower stems to lengthen normally – which means most foliage won’t emerge very far above ground this early. And most bulb foliage and even flowers can take freezing in stride. When temperatures drop below 15 degrees or so, any foliage that’s above ground may be killed, but whatever is still underground will be unharmed and continue growing normally in the spring.

On the other hand, there’s not much you can do to protect your plants from the weather.

You could scatter a layer of loose straw, hay, or evergreen branches over any foliage that has emerged. This will help protect it from the drying effects of winter sun and wind, and prevent the ground from repeatedly freezing and thawing which can damage roots.

You can find other helpful information in the Weather and Hardiness section of our Newsletter Archives, or check out “How Will This Mild Weather Affect Our Plants” at Larry Hodgson’s Laidback Gardener blog.

Other than that, we suggest you just relax, accept that Nature is a lot more powerful than we are, have faith in the resiliency of plants – and maybe make a New Year’s resolution to do something more this year to be good to the Earth.

Dec
3
2015

Learning from You: Lilies in the Living Room

Speaking of lilies, here’s an unexpected way to enjoy them up close, from our good customer Kathryn Hubler of Falls Church, Virginia:

“I thought you’d enjoy this photo of the gold-band lilies we received from you last year blooming in our living room. We’ve discovered we like to grow them in pots so we can enjoy their beautiful blooms and scent indoors. A pot of them is now a necessity, so we ordered fresh bulbs from you this year and will rotate the old ones into the garden.

“I grow the lilies outside, protecting the pot in the winter, and then when the first bud opens I bring them inside by our sunny, south facing window. I started doing this by accident one year when I brought the pot indoors to protect the flowers during a big rain storm. They last longer indoors, they’re never damaged by deer, slugs, or earwigs, and their fragrance is divine!”

Two of the most influential gardeners of the 20th century, Gertrude Jekyll and Vita Sackville-West, would probably approve of Kathryn’s technique. Both recommended growing fragrant lilies in pots and then moving them onto the terrace, near doorways, or alongside garden benches when they came into bloom, as they did in their own famous gardens.

Kathryn planted her lilies in the fall which gave them plenty of time to develop a good root system before they had to start growing above ground. Spring-planted lilies may be more of a challenge in pots, but we plan to try gold-band and ‘Uchida’ ourselves this spring, and we’ll let you know how they do.

For tips on growing all sorts of bulbs in containers, see our Bulbs in Pots page. Have fun, and send us your photos!

Nov
5
2015

Thwart Animals with “Noxious, Unpalatable” Bulbs

We love animals, but we love flowers, too. In a recent article for the Associated Press, our good friend Dean Fosdick passed along some advice from an esteemed colleague about bulbs that are “noxious and unpalatable to foraging wildlife:”

“‘Members of the amaryllis family are the best long-term choice for predator control, particularly daffodils, snowdrops, and snowflakes,’ said Christian Curless, a horticulturist with Colorblends, a wholesale bulb company. . . . All contain lycorine, an alkaloid both repellent and toxic to animals. . . . ‘These plants we label as deer-and-rodent-“proof” because even a starving animal won’t eat them. The bulbs we classify as “resistant” are, for reasons we often don’t understand, not preferred by deer or rodents or both. Bulbs in this category include allium, hyacinth, fritillaria, and anemone.”

Other great animal-proof members of the amaryllis family include our fall-planted sternbergia, oxblood lilies, surprise lilies, and red spider lilies and our spring-planted crinums.

And for our tips for protecting bulbs like lilies and tulips that animals love to eat, see the Pests and Diseases section of our Newsletter Archives.

Oct
21
2015

Learning from California:
Gardening with 28% Less Water

Congratulations to our friends in California who, faced with what’s been called the drought of a lifetime, have cut their water use by 28% in the first three months of state-mandated reductions.

drought-resistant Byzantine glads – www.OldHouseGardens.com
drought-resistant Byzantine glads

In September, my wife and I saw the drought first-hand while visiting our son and daughter-in-law in San Francisco. Plants drooped, dead leaves littered the sidewalks, and lawns in the city’s parks sported signs proclaiming “Brown is the New Green.”

It’s no wonder our orders from California are down 25% this fall! But bulbs, ironically, are built for drought. Many have evolved in areas where summers are so dry that to survive they have to hide out underground. Tulips, hyacinths, alliums, Byzantine glads, freesia, and oxblood lilies, among others, actually do better with dry summers – although they need some water in fall through winter to develop roots and more in spring to grow leaves and bloom.

In August the Pacific Horticulture Society newsletter offered some excellent tips for xeric gardening, by editor (and OHG customer) Lorene Edwards Forkner:

“Recently I read some great, if somewhat blithe, advice from garden writer Amy Stewart on tending a low/no water garden:

“1. Plant drought tolerant plants.

“2. Wait and see what dies.

“3. Plant more of what didn’t die.

“You can read the entire piece at The No-Water California Garden.

Lorene also recommended “Adventures in Growing” about an American woman “creating a fertile landscape in Saudi Arabia and winning the hearts and minds of its caretakers,” this advice from “the great minds at Flora Grubb Gardens,” and Jeff Moore on the “Generosity of Succulents.”

“Then hit those fall sales,” she concluded, “for a dose of colorful, graphic, and resilient plants that take dry weather in stride” – including our fall-planted bulbs!

Oct
1
2015

Seasonal Tips: Fall Bulb Care

Besides planting bulbs, there’s a lot more you can do in the fall to make your garden a healthier and more beautiful place – so here’s some seasonal guidance from our always helpful website:

how to clean up iris and peonies NOW to protect them from borers and mildew,

how to dig and store dahlias, glads, tuberoses, crocosmias, rain lilies, and crinums (but only IF you want to!),

how to plant spring-blooming bulbs in outdoor containers,

how to force bulbs indoors for winter bloom.

For even more, check out the 39 other links at our complete Planting and Care page. Or email or call us. We’re here for you!

Oct
1
2015

Earthworms: The Good, the Bad,
and the Latest Research

“Why would anyone want to destroy earthworms?” we asked in our July article “Advice from 1683: Killing Earthworm Pests with Tobacco.” In the 1600s it was to keep unsightly worm castings from blemishing gravel paths, but today there’s a different reason.

“In northern parts of the country, earthworms are not native,” our good customer Robin Schachat of Shaker Heights, Ohio, explains. “It’s now thought that the greatest loss of the duff layer in our native forests is due to earthworm infestations, not to deer browsing.”

Although worms can be beneficial in the disturbed and compacted soils of our backyards, since the last glaciers retreated some 14,000 years ago there have been no native worms in the area once covered by them —north of NYC and the Ohio and Missouri rivers, and in the Rockies and parts of Washington — so in those areas forest ecosystems evolved without worms.

Recent research at the University of Minnesota has shown that “without worms, fallen leaves decompose slowly, creating a spongy layer of organic ‘duff.’ This duff layer is the natural growing environment for native woodland wildflowers. . . . Invading earthworms eat the leaves that create the duff layer and are capable of eliminating it completely. Big trees survive, but many young seedlings perish, along with many ferns and wildflowers.”

Although there are native earthworms in unglaciated parts of the country, if you live further north we encourage you to learn more at the Invasive Earthworms page of the Minnesota DNR and at the Great Lakes Earthworm Watch.

Sep
9
2015

“Easy Arranger” for Even Easier Bouquets

Fresh, local, and almost free, bouquets from your own backyard are one of the great pleasures of gardening. And they’re easy – so I admit I was skeptical when Vanessa brought a little wire doohickey called an Easy Arranger into work one day. It’s a grid of woven wire that fits over the top of a vase and holds flowers upright and in place. Once I tried it, though, I was convinced. This thing really does make bouquet-making easier.

It’s all but invisible, too, and relatively cheap. We ordered a set of three different sizes from thegrommet.com for $12 plus $2.20 shipping. You can find look-alikes elsewhere, but the Grommet sells the original by Annabelle Noel Designs, “a firm with a mission to launch innovative household products designed and manufactured by women. Its founder Anne Cork tapped her jewelry-making skills to create Easy Arranger after being inspired by the tape grids she saw florists using to hold their flowers in place.” Check it out here – and happy bouquets!

Jul
8
2015

Daylilies in Bouquets? Definitely!

You might not expect it, but daylilies make fine cut-flowers – or at least our graceful heirloom varieties do. Although an individual flower lasts just one day, buds will continue to develop and open for up to a week indoors.

Way back in 1954, two University of Illinois professors wrote in a USDA booklet that “daylilies have become very popular for home flower arrangements.” They recommended cutting stalks with “several perfect full-blown flowers and a number of well-developed buds,” ideally in the morning when they’re “still fresh and undamaged by wind, sun, or insects.”

“With a little practice, almost anyone can display them to advantage,” the professors continued. “They may be used alone or in combination with other garden flowers and a wide variety of green and dried materials. Delphiniums, gaillardias, gladioli, Japanese iris, Shasta daisies, snapdragons, and zinnias are only a few of the many annuals and perennials that work up nicely with daylilies. Endless combinations can be devised that will brighten up the mantel, party table, or altar. Leaves of caladium, canna, hosta, iris, and peony can be used effectively in place of the natural foliage, as can also the graceful branches of various shrubs and evergreens such as huckleberry, magnolia, rhododendron, and yew, [or] the silvery leaves of artemisia.”

To learn more about using other bulbs in bouquets – from snowdrops to dahlias – visit oldhousegardens.com/BulbsAsCutFlowers .

A late May bouquet with extra-early ‘Sovereign’ (left), ‘Gold Dust’ (right), and ‘Orangeman’ (center and top).
Country Gardens featured this lush bouquet with ‘Orangeman’ and ‘Gold Dust’ in their 2014 article about us.
Jun
11
2015

Bulb Care Tips for June and July

Dealing with YELLOWING FOLIAGE – If you want your spring-blooming bulbs to multiply and bloom again next year, you have to let their foliage continue to photosynthesize until it begins to yellow. Learn more.

Giving Bulbs a DRY REST – Many bulbs – especially tulips and hyacinths – do best in soils that stay relatively dry in summer, so avoid watering them after they go dormant, and don’t overplant them with thirsty annuals.

Bulb Care Tips for June and July

DIVIDING DAFFODILS – When daffodils get overcrowded, they bloom less. The best time to dig and divide them is when their foliage yellows or shortly afterwards. You can replant them immediately or store until fall.

DEADHEADING PEONIES – After bloom, trim flower-stalks back for a neater appearance, but be sure to leave as much foliage as possible to feed the plant for future increase.

PINCHING DAHLIAS – For a bushier plant, pinch out the center shoot after three or four sets of leaves develop.

Controlling IRIS BORER – The first signs of this pest are leaf edges that look water-soaked or chewed. Poison-free control is relatively simple. Learn more.

DIVIDING IRIS – If you want to divide or move your bearded iris, it’s best to do that during their semi-dormant period four to eight weeks after bloom. Learn more.

Controlling THRIPS ON GLADS – These virtually invisible insects multiply quickly in warm weather and can be devastating. The first step to control is keeping a sharp look out for early signs of damage. Learn more.

Making CUT FLOWERS Last – Picking your own fresh bouquets is one of the joys of gardening! Learn more.

May
14
2015

What Was Missing in Your Spring Garden?

Do yourself a favor and walk your garden now, while spring is still fresh in your mind. Where did you need more flowers? And when – early, middle, or late? What flowers did you admire elsewhere this spring that you’d like to see blooming in your own yard next spring?

Take a couple of minutes to jot down a few notes, snap some cell-phone photos, sketch a simple map, or even mark a couple of spots with plant labels, golf tees, or small sticks. At planting time this fall – when spring has faded from your memory and your garden looks so different – you’ll be glad you did.

Even better, why not get a start on your fall order now at LAST year’s prices? Crocus and other little bulbs to scatter about, deer-proof daffodils, fragrant hyacinths, and a rainbow of tulips can all be yours. And you can add to your order anytime before October 1, so there’s no need to wait. Simplify your life, beautify your garden, and save money by ordering NOW!

May
14
2015

Celebrate Dirt with the International Year of Soils

Getting your hands in the dirt is one of the great pleasures of gardening (am I right?), and we gardeners understand first-hand the importance of soil. Now you can help spread the word about this critical natural resource by celebrating the International Year of the Soil. The global campaign is built around six key messages that highlight how we all depend on soils:

1. Healthy soils are the basis for healthy food production.

2. Soils provide us with plants we use for feed, fiber, fuel, and medicine.

3. Soils support our planet’s biodiversity, hosting a quarter of the total species.

4. Soils help combat climate change by playing a key role in the carbon cycle.

5. Soils store and filter water, improving our resilience to floods and droughts.

6. Soil is a non-renewable resource and its preservation is essential for a sustainable future.

That last one really gave me pause. A non-renewable resource is defined as one whose “loss and degradation is not recoverable within a human lifespan,” and today 33% of the world’s soil is considered “moderately to highly degraded due to erosion, salinization, compaction, acidification, and chemical pollution.”

To learn more, visit the Soil Science Society of America’s activities page at https://www.soils.org/IYS where you’ll find “I Heart Soil” stickers in a dozen languages including Klingon, recipes for “soil desserts,” educational packets for teachers, and monthly themes such as “Soils are Living.” It’s already given me a whole new appreciation for soil’s importance – and its vulnerability. Save the Soils!

May
14
2015

3 Ways to Support Your Big, Beautiful Peonies

Au Naturel – Although we always look for strong stems when we’re evaluating peonies for our catalog, even the strongest stems will bow when their gloriously double flowers are drenched by rain. If you gently shake the water out immediately afterwards, most of the time they’ll stand back up, so most gardeners simply cross their fingers and grow their peonies without support, au naturel.

Cheap and Easy – Although garden centers offer all sorts of wire-ring and linking-stake supports for peonies, most of these are surprisingly pricey. A less expensive option (and what we usually do here at OHG) is to cut a wire-ring tomato tower in half just above one of the rings, so you have two shorter towers. Use the narrower one for newly-planted peonies or smaller perennials, and the wider one for mature peonies. Set it over the plant, pushing the legs securely into the soil. The earlier you do this the better, because once the plant has leafed out you’ll need a helper – or twine – to contain the foliage while you slip the support over it. Leave some stems and foliage outside the support for a more relaxed, natural-looking plant and to hide the wire which is virtually invisible anyway, especially once it rusts.

The Hildene Star – There’s a better, more historic way they use to support the 175 peonies at Hildene, the summer home of President Lincoln’s son in Manchester, Vermont. Basically you insert five short stakes in a circle at the outer edges of the plant, weave twine back and forth to create a star, and then finish by circling the stakes with twine. Hildene’s Andrea Luchini offers complete instructions. Although I can’t imagine doing it for 175 peonies, for a few it’s actually kind of fun.

Apr
21
2015

Planting Tip: Glads
Bloom Facing the Most Sunlight, But . . .

We love the way glads add vertical exclamation points of color to the summer garden. To enjoy them the most, though, it pays to site them carefully, as explained in the NAGC’s journal Glad World:

“Glads, like daffodils, tend to face the direction from which they receive the longest period of direct sunlight. While you might expect this to be south, early morning or late afternoon shade from nearby trees or buildings might cause those glads so shaded to face due east or west, or southeast or southwest, depending upon how the shade pattern moves with the sun during the day. . . . Facing is an important consideration since you would like to view the front of the spike from whatever vantage point you usually view the bed, border, or pot.”

Keep that in mind when deciding where to plant your glads, but don’t worry – you can get your glads to bloom facing any direction you want if you (a) plant them in a pot (say, in your vegetable garden) and then (b) when the first florets open, move the pot into your flower garden or onto your front steps and turn it any way you like. To try this trick yourself, why not order a few glads – such as the graceful, fragrant Abyssinian glad or our customers’ favorite ‘Atom’ – for spring-planting?

Apr
21
2015

See the Difference: English vs. Spanish Bluebell

Spanish bluebells are great. Also known as squill in the South, they’re tough enough to bloom and naturalize just about anywhere.

But if it’s English bluebells you’re looking for – the iconic wildflower of British woodlands – you’ll need to know how to tell them apart, because counterfeits are ubiquitous.

As head gardener Quentin Stark explains in the May 2015 issue of The English Garden, English bluebells are “a wonderful rich blue. The flowers are tubular and grow on just one side of the stem” – which you can clearly see in this accompanying photo – “and they have an amazing scent. Spanish bluebells are taller, with paler blue, more open flowers, have no scent, and the flowers grow all the way around the stem, making the plant more upright.”

Our true English bluebells are the real deal. They come to us from a small nursery in Wales where they’re native, and you can order yours now for fall planting at last fall’s prices.

Apr
2
2015

Tips from 1954:
Companion Plants for “Up and Coming” Daylilies

“Gaining rapidly in popularity, daylilies are truly one of the most up-and-coming perennials we can choose for our gardens,” wrote G. M. Fosler and J. R. Kamp in a nifty little 1954 booklet titled Daylilies for Every Garden. With its mid-century vibe, the booklet offers these tips for companion plantings:

“Daylilies are often planted with early bulbous stock, such as tulips and daffodils. The daylily foliage does not interfere during the blooming periods of these plants. Later in the season the maturing and unattractive bulbous foliage is hidden by the expanding lush daylily clumps.

“The earliest blooming varieties [such as ‘Gold Dust’, ‘Sovereign’, and ‘Orangeman’] are effectively combined with bearded iris, the whites and the delightful shades of blue and purple in iris contrasting beautifully with the gold and yellow daylilies. The later daylilies . . . also make ideal garden companions for bearded iris and peonies. Daylily foliage does not grow very large until after the iris and peony blooming seasons are past. It is then that the daylily really comes into its own to continue the succession of color in the garden.

extra early ‘Orangeman’

“For pleasing effects later in the summer, the artistic gardener will think of endless combinations. Some daylilies work in well with colorful phlox, columbine, and blue delphiniums. Purple liatris is very striking with yellow daylilies. Many daylily colors also harmonize pleasingly with Shasta daisies, floribunda roses, oriental poppies, platycodon [balloon flower], hardy lilies, and even fall chrysanthemums. Highly interesting foliage contrasts are also possible with such plants as canna, coleus, dusty miller, and hosta. . . .

“An all-season perennial border made up of tulips, iris, peonies, daylilies, and chrysanthemums will provide continuous interest from early spring until frost.”

We’re shipping all 18 of our heirloom daylilies right now, but please note that in a few weeks they’ll be too large to ship safely, so if you want them, NOW is the time to order.

Mar
4
2015

Spring Tip: Fertilize Early, Before Foliage Emerges

Like all plants, your bulbs will do better when their nutritional needs are met, and that usually means fertilizing them every now and then. Early spring is one good time to do it, before – or as soon as – the foliage emerges. Don’t wait too long, though, or you’ll find it’s hard to keep fertilizer granules from lodging among the emerging leaves where they can burn the tender foliage.

Although it’s always best to be guided by a soil test – and over-fertilizing can cause long-term problems – if you haven’t fertilized in a while, you’re probably safe doing it this spring. A relatively balanced (something like 8-8-8), slow-release fertilizer is best, but anything other than high-nitrogen (the first number) lawn fertilizers will work just fine. Fertilizing can be especially helpful in revitalizing crowded clumps of daffodils that no longer bloom well.

Oct
16
2014

To Protect Your Lilies, Plant Alliums

Our good customer Amy Reynolds of Saint Louis, Missouri, emailed us this helpful tip:

“Your lily bulbs are fabulous! I popped them in the ground immediately. To protect them from an abundant local rodent population, I’ve planted them (as I always do with lilies) with several allium companions. I’ve found that squirrels and chipmunks won’t excavate past the alliums to get to nearby lily bulbs while they’re dormant, and the rabbits won’t go near allium foliage come spring.”

To try this yourself, why not order a few of our fabulous lilies and alliums right now?

Sep
24
2014

Learning from You:
Pink Surprise Lilies Beyond Zones 6-7

Thanks to all of you who responded to our query about growing pink surprise lilies, Lycoris squamigera, outside of the narrow range we’d been recommending for them. You gave us lots of great feedback, and here’s the short version of what we learned.

ZONES – Many readers told us they’ve had long-term success with surprise lilies in zones 5b and 8a, and for the past couple of years we’ve been getting our bulbs from a third-generation bulb farm in 8a, so we’ve now expanded our zone recommendations to include zones 5b-8a(8bWC).

SOIL – Although well-drained soils are usually recommended for surprise lilies, several readers say theirs grow just fine in clay soil. Clay is dense, though, which makes it harder for bulbs to multiply, and it holds water longer which can cause bulbs to rot.

WATER – Many readers say they never water their surprise lilies, and that may be a good thing. Like most bulbs, they do best when they’re relatively dry during their summer dormancy. Since many of us water our gardens then, this could be one reason they’re often found surviving in lawns and “neglected” areas that get less watering – though of course they do need water when they’re not dormant, from fall through the end of spring.

Learning from You: Pink Surprise Lilies Beyond Zones 6-7 – www.OldHouseGardens.com

SUN/SHADE – Full sun seems to suit them best, especially the further north they’re planted. But many of our readers said they do well in partial shade, too, especially if it’s from deciduous trees which leaf out later.

PLANTING DEPTH – Some authorities say to plant them with the neck just under the soil surface, but our expert North Carolina grower recommends planting them so they’re covered with 2-4 inches of soil. Since the bulbs we ship are 3-4 inches tall, that means planting them with the base 5-8 inches deep.

LONG WAIT FOR BLOOM – If you dig them from a neighbor’s yard you probably won’t have this problem, but if you plant dry, dormant bulbs you’ll have to be patient. Although most will put up leaves their first spring, sometimes nothing emerges until the spring after that, and they virtually never bloom until their second or even third year.

Thanks again to everyone who helped us “crowd-source” this article! For the longer version, including quotes from customers growing them everywhere from zone-3 Saskatchewan to zone-9 Florida, see our More About Surprise Lilies page.

Sep
24
2014

“Great Bulbs That Last”

That’s the title of an excellent article by Karen Bussolini in last September’s American Gardener. “The best surprise of the first spring in my new home in Connecticut,” Karen writes, “was a mass of shaggy, fragrant daffodils that bloomed like crazy. . . . They were growing all over the neighborhood, but I couldn’t find them in any of my books or catalogs.” It turned out they were ‘Van Sion’, from 1620, and “twenty-five years later, they’re still going strong.” Bussolini asked experts around the country to recommend other “durable bulbs” like that which “come up every spring [and] bloom with no effort on a gardener’s part,” and many of them were heirlooms:

NORTHEAST: In addition to ‘Van Sion’, Bussolini recommends daffodils such as ‘Thalia’, and ‘Ice Follies’, as well as tommies, winter aconite, traditional snowdrops, and Tulipa clusiana.

“Great Bulbs That Last” – www.OldHouseGardens.com
Scilla siberica

SOUTH: Scott Ogden in the humid Gulf South notes that “wild narcissus such as N. jonquilla . . . have naturalized in roadside ditches and Lent lilies (N. pseudonarcissus) are taking over old pastures.” Scott also recommends Byzantine glads, crinums, rain lilies, oxblood lilies, and red spider lilies.

MIDWEST: Jill Sellinger of the zone-5b Chicago Botanic Garden says, “Almost all narcissus will perennialize beautifully here,” and Scilla siberica and Spanish bluebells spread eagerly.

MOUNTAIN WEST: In zone-9 Tucson, Arizona, Scott Calhoun recommends T. clusiana and white rain lilies. In dry, zone-5b Fort Collins, Colorado, Lauren Springer says “only grape hyacinths and foxtail lilies survive . . . without irrigation,” but with one inch of water a month C. chrysanthus, tommies, and Byzantine glads do well, and if you double that in spring so will species tulips such as T. clusiana. “Most alliums are champs,” too, she adds.

“Great Bulbs That Last” – www.OldHouseGardens.com
tommies

WEST COAST: Greg Graves in zone-8a Graham, Washington, recommends ‘Thalia’ and pheasant’s-eye daffodils, tommies, snowdrops, snake’s-head fritillaries, and T. clusiana. In zone-10a Encinitas, dry-climate gardening expert Nan Sterman “relies on slim, elegant” Byzantine glads. And on zone-10b Alcatraz, our good customer Shelagh Fritz says that when the Garden Conservancy started restoring the abandoned gardens there, “as soon as the winter rains began, bulbs started popping up,” including Scilla, grape hyacinths, snowflakes, daffodils, and gladiolus.

For more, read the entire article. And then, as Bussolini recommends, “plant some new bulbs that will yield a huge payoff for many years to come.”

Sep
24
2014

Mildew on Your Peonies? Act NOW to Control It

Although peonies are rarely bothered by pests or diseases, powdery mildew has become a problem in some areas. We first wrote about it in 2012, and expert Don Hollingsworth recently offered his perspective in the APS Bulletin. Don has been growing peonies since the 1930s but he says “it was not until 2014 that I noticed the striking sight of white mildew” on a few of the hundreds of peonies at his farm in Missouri. He searched the web but found no explanation as to “why powdery mildew is only now taking hold on peonies, while it has long been known to affect other commonly grown ornamental plants.”

To control it, Don says “the first line of defense is to clean up and destroy all infected plant parts at season’s end” to prevent spores from overwintering – and earlier is better than later. Instead of waiting until late fall, cut infected plants to the ground and carefully bag and remove all foliage “before the leaves dry up, which is best accomplished well before frost.” Don also offers a recipe for a preventative spray by the Massachusetts Master Gardeners: “In a quart of water add a few drops of liquid dish soap and a teaspoon of baking soda.” That’s similar to the spray we recommended two years ago: Mix 1 tablespoon of baking soda and 1 tablespoon of horticultural oil (or vegetable oil) in a gallon of water. Spray weekly throughout the spring, using a new mix every time and avoiding overuse to prevent a build-up of salts in the soil.

Sep
3
2014

Wacky Dahlias: Why Did My ‘Nonette’ Bloom Red?

Dahlias are incredibly diverse, and most of the time that’s a good thing — but not always. Unlike most living things which have two sets of chromosomes, dahlias are octoploids which means they have eight. This wider range of genetic possibilities is the source of their astonishing diversity, but it also creates more opportunities for things to go awry.

Chimeras — named for a mythological beast that was part lion, goat, and snake — are plants in which cells of two different genetic make-ups exist side by side. Many bi-tone, speckled, and other variegated dahlias are chimeras, and the interaction between their genetically different sections or layers is often unstable.

‘Nonette’, for example, is usually an apricot colored dahlia sprinkled with tiny bits of red, but sometimes one or more of its flowers are all apricot or all red. (See photos of this and more at our Wacky Dahlias page.) Most of the time most flowers of a chimera are normal with only a random few being different, but sometimes the entire plant changes so that all of its flowers are different, and sometimes only one section of an individual flower goes wacky.

Growing conditions can make a difference, too. Flower colors often change as the weather cools and sunlight diminishes in the fall, and stressful conditions — too much heat or not enough water, sunlight, or nutrients — can sometimes make double flowers bloom with fewer petals.

Most of these changes are only temporary (and often entertaining), but if you have a dahlia that bloomed all wrong this year, please let us know so we can send you a refund, credit, or replacement. And if you have a photo of one of our dahlias gone wacky in your garden, we’d love to see it!

Sep
3
2014

“Best” Blogger Chats with Scott
about Bulbs from Snow to Iris Season

Margaret Roach’s AWayToGarden.com was named “Best Overall Blog” at last year’s first-ever Garden Bloggers conference. If you’re not already a devoted reader, why not take a look at Margaret’s recent talk with me about having bulbs in bloom from snow to iris season.

We started with winter aconites (with a great photo of them in Margaret’s garden) and other small, mostly animal-resistant beauties including Turkish glory-of-the-snow (Margaret’s favorite). I did my best to talk her into hyacinths (today’s un-coolest bulb, but awesome), and we touched on fragrant daffodils, tulips, and the very animal-resistant snowflake.

Although it’s not in the written version, if you listen to the podcast of our talk you’ll hear why Margaret says the voles, chipmunks, and rabbits in her garden “never got the memo” about Crocus tommasinianus being animal-resistant. One fall she planted 4000 for a Martha Stewart Living photo shoot but only four survived to bloom in the spring — a painful reminder that animal-resistance ranges from “extremely” to “moderately,” and if they’re hungry enough animals will eat just about anything.

Sep
3
2014

Rogue Voles Teach
Cornell Scientist about Animal-Resistant Bulbs

When voles ate bulbs intended for a study on deer-resistance, Cornell University’s Bill Miller made the best of it. In the fall, Miller had potted up the bulbs and put them into cold storage. Unfortunately in spring he discovered that “during the winter, prairie voles had taken up residence in the stacks of crates and had eaten more than 35% of the bulbs. We found two large nests of voles, and the youngsters were quite happy, well fed, and growing fast from their nutritious meals. . . . Of course we were not happy with this, but we used it as an opportunity to learn some things about vole feeding and flower bulbs.” The voles’ favorite bulbs included tulips, crocus, Anemone blanda, and Chionodoxa luciliae, but they avoided those listed below. Deer would, too, Miller points out, since deer and voles are known to have similar tastes.

Hyacinths – “Bulbs were not attacked and shoots were perfect when uncovered. . . . From this we can conclude that hyacinths are pretty immune to attack from voles, and my own experience suggests that deer usually leave hyacinths alone.”

Daffodils – “Voles dug in about 10% of the pots but did not damage the bulb or emerging shoots” – and most gardeners know that daffodils are reliably deer-resistant.

Other bulbs that “experienced little or no damage” included snowdrops, snowflakes, cyclamen, trout lilies, and crown imperial. Others that were “injured but not destroyed” included alliums such as Allium sphaerocephalum (10% damage), winter aconite, and Siberian squill.

Jun
11
2014

Buzzing about Pollinators:
It’s National Pollinator Week!

Buzzing about Pollinators: It’s National Pollinator Week! – www.OldHouseGardens.com
‘Pearl’ double tuberose and friend.

The eighth-annual Pollinator Week kicks off on Monday, June 15, and we’re hoping gardeners everywhere will join the celebration.

As Hunter Stanford writes in the current issue of American Gardener, “Pollinator Week is an opportunity to celebrate pollinators and promote awareness of the important role birds, bees, butterflies, bats, and many other pollinators play in our food supply and maintaining healthy and diverse ecosystems worldwide.”

Pollinators account for one out of every three bites of food we eat, and the populations of many of them have declined drastically over the past decade, so one of this year’s goals for Pollinator Week is “teaching people about the causes of pollinator decline and how they can help.” (Learn more at “A World Without Bees.”)

Buzzing about Pollinators: It’s National Pollinator Week! – www.OldHouseGardens.com
Winter aconite: extra-early bee favorite.

One way to help is to garden with pollinator-friendly plants, so I asked our bee-keeping neighbor Eileen Dickinson what bulbs she’d recommend. “Winter aconite and crocus are really important early bulbs,” she emailed me. “I see bees all the time in the Scilla siberica, bringing blue pollen into the hive. Grape hyacinths are good. And of course German garlic.”

Eileen also pointed me to the website of Spikenard Farm Honeybee Sanctuary where I found a great page about bee-forage plants which includes “all spring bulbs” on its short list for gardeners with limited space. For a more specific list of bee-friendly bulbs, see the recommendations posted at our Facebook page by our good customer and avid bee-keeper Ron Geer. Thanks, Eileen and Ron, and Go Pollinators!

Mar
7
2014

Bulbs in Pots: Our New Page
of Tips for Tuberoses, Rain Lilies, and More

Every summer we decorate our front porch with pots of fragrant tuberoses and little pink rain lilies, while out in the back yard we tuck pots of glads in among the perennials to provide exclamation points of color.

You can, too! Most spring-planted bulbs are easy to grow in containers, and you’ll find everything you need to know at our newly expanded “Bulbs in Pots” page.

Read it now and get ready for a summer filled with beauty, fragrance, and fun.

Oct
24
2013

Bulbs for Partial Shade, South and North

In her weekly column in South Carolina’s Greenville News, Marian St. Clair offers good advice for shade gardeners everywhere — and recommends several of our bulbs that she’s planting this fall.

“Spring-flowering bulbs grow and bloom from energy stored within the bulb the previous year,” Marian explains.

“For repeat bloom, gardeners must maintain nutrient-rich and moist soil conditions to nurture the bulb until foliage dies back and the bulb becomes dormant.” It’s also critically important, she adds, that bulb foliage receive “the maximum amount of sunlight. For success, shade gardeners should select bulbs that flower early, so foliage has time to restore energy to the bulb before trees produce a new crop of leaves.”

For her zone-8, South Carolina garden, Marian writes that she’s “especially excited about a pair of early-blooming daffodils from Old House Gardens. . . . ‘Early Pearl’, a tazetta . . . rediscovered in an old garden in our region’s ‘Spanish moss belt,’ [and] Campernelle; a tried-and-true heirloom grown for more than 400 years. . . . This fragrant yellow daffodil looks like a wildflower compared with many of the new, chunkier hybrids . . . and its slightly twisting petals remind me of a child’s pinwheel.”

Other shade-tolerant heirlooms from us that she’s planting this fall — all of which are good north through zone 5 as well — include Crocus tommasinianus, “a lavender beauty known as the best crocus for the South,” white Spanish bluebell, giant snowdrop, and Trillium grandiflorum.

Jul
11
2013

Tips for Success: Growing Bulbs in Pots Outdoors

Container gardening is increasingly popular, and we’re big fans of it. But you can’t grow bulbs such as daffodils and tulips in containers the same way you’d grow them in the ground. Even the largest container is a tiny, cramped, highly artificial world where the wrong potting soil, extreme temperatures, or a few days without water can spell disaster.

If you know what you’re doing, though, it’s easy – and we’re here to help. For step-by-step guidance from choosing the best containers to spring bloom and beyond, check out our new Bulbs in Pots page.

Photo by tanyasgarden.blogspot.com.

Jun
5
2013

Blasting: Why So Many
Good Buds Went Bad This Spring

“Why didn’t my buds open?” That’s a question we heard a lot more than usual this spring. When buds form but fail to develop into flowers it’s called “blasting.” This usually happens because the plant didn’t get what it needed, and first-year plants with immature root systems are most at risk.

Too Little Water – Spring-blooming bulbs such as daffodils and tulips need plenty of water (a) in the fall to grow roots and (b) in the spring to grow leaves and buds that open successfully. If there’s a stretch of dry weather in the fall, initial root growth will be hampered and the bulb may never catch up. The same thing can happen when there’s a stretch of dry weather in spring. Either way, once the rush of spring growth begins above ground, a bulb without plenty of roots may manage to develop foliage and buds, but if it can’t draw up enough water fast enough, those buds will blast.

New Bulbs and Late Planting – Inadequate root development is more often a problem for newly planted bulbs, and even more so for bulbs that are planted late in the fall.

High Temperatures – When spring heats up or temperatures spike, even bulbs with good root systems can struggle to supply their buds with enough water to make up for what’s being lost through transpiration. When they can’t, the buds blast. Late-blooming varieties are most at risk, as well as bulbs planted in hot spots.

Too Little Sun – Sun-loving plants such as marigolds and peonies won’t bloom well in the shade, and the same is true of sun-loving bulbs. If they can’t photosynthesize enough to fully develop their buds, they’ll blast.

Storage Problems – Dormant bulbs should be stored at temperatures above freezing but cooler than 72 degrees or so, and protected from ethylene gas which is contained in automobile exhaust fumes and produced by ripening fruit.

Doubles, Etc. – To develop their many extra petals, double flowers require more moisture and sunlight, which means they blast more easily. Pheasant’s-eye narcissus do, too – and especially double pheasant’s-eyes – because their roots develop slowly and they bloom late when spring is at its warmest.

Solutions – In most cases – and especially for newly planted bulbs – the most important thing you can do is keep your bulbs well watered from early fall, when they start growing new roots, until a couple of weeks before the ground freezes solid (or all winter if it doesn’t), and then again in the spring while they’re busy producing leaves and flowers. If you do that, and Mother Nature is kind, you can expect to have very few blasted buds and lots of beautiful spring flowers.

May
7
2013

Glads for Free: Tips for Growing
Your Tiny Cormlets into Big Fat Corms

If you dug and stored your gladiolus last fall, you probably found lots of tiny cormlets – aka cormels – clustered around their bases. Plant those this spring and before long you’ll have hundreds of glads for free. Cliff Hartline in the NAGC’s Glad World offers these expert tips:

“Generally speaking, any cormel that falls thru a 1/8-inch screen does not produce well. . . . I only plant cormels the size of a pencil eraser or larger. I pass all my cormels over a 1/4-inch screen and plant those that do not fall through. . . . The larger ones will definitely give you a larger corm to harvest and . . . if they are planted early, they will often bloom in September. . . .

“One year after I finished digging my large corms about September 20, I had the time to dig my glads from cormels. After pulling a few out of the ground, I saw that the corms were the size of a quarter or smaller. I decided to foliar feed them, and I applied fungicide at the same time.

Glads for Free – Tips for Growing Your Tiny Cormlets into Big Fat Corms – www.OldHouseGardens.com

We had a frost October 15 so I dug them immediately after that. Many of the corms were jumbos, most were large, and very few were smaller. I would encourage people to wait until frost to dig cormel stock, and foliar feed late in the year. . . . The September feeding seemed to rejuvenate the growth and the fungicide kept the foliage healthy.”

We’ll remind you that cormlets have nearly impenetrable outer shells and they’ll sprout much better if you either nick or gently crack these or simply dissolve them by soaking in full-strength household bleach for a few hours immediately before planting.

Plant cormlets in full sun, 1-2 inches deep and 1-2 inches apart, depending on size. Keep the soil moist but not soggy until grass-like foliage emerges and, for optimal growth, throughout the summer.

Good luck, have fun, and let us know how they do for you!

Mar
26
2013

Protect Your Daylilies with Vick’s Vapo-Rub

Got deer? Here’s a tip from our good friend Diana Bristol of Bloomingfields Farm, deep in the deer-infested wilds of Connecticut, who swears by it:

Put a little Vick’s Vapo-Rub on your thumb and index finger and then touch bud or leaf with it here and there.

Diana says touching the smallest buds on a stalk is especially effective because the Vapo-Rub will remain on them for a long time before they get big enough to bloom and drop.

Nov
1
2012

Jane’s Easy Daffodil Baskets

When our good customer Jane Baldwin of zone-6a Moreland Hills, Ohio, found herself with surplus bulbs late one fall, she improvised an easy solution that ended up delighting her.

“A couple of years ago,” she writes, “I got caught by early snow so I planted the last of my daffodils in baskets. It looked fabulous and I highly recommend this to anyone, even if you’re not in the same predicament. In fact, it’s how I’m planting most of the daffs I ordered from you this fall.

“The baskets were just ones I found in the garage when we moved in. [If you don’t have any in your garage, thrift shops often sell them for a dollar or two.] They were nothing fancy, older and seasoned by years of use, approximately 6 inches deep and 1-3 feet across. I put a few inches of good potting soil in them and then planted the bulbs right smack against one another with their tips just barely covered by the soil. Smaller-flowered varieties such as ‘Thalia’ and ‘Niveth’ went in the smaller baskets and bigger ones such as ‘Beersheeba’ and ‘Carlton’ in the bigger baskets.

A Basket of Beersheeba Bulbs – www.OldHouseGardens.com

“I put them in our attached garage so they would get the necessary cold, and made sure that mice couldn’t get to them. I watered them at first but eventually the soil froze. At the end of winter when it started to thaw, I brought the baskets out on the patio to a sunny spot where they bloomed to perfection. Even though there were only 2-3 inches of soil under the bulbs and they were planted right next to each other, they performed just fine and looked exquisite in the baskets for a good long time. It was really very easy, and even our chipmunks and squirrels left them alone out there.

“At the end of spring I took the bulbs out of the baskets and kept them dry over the summer in the garage. Now they are planted on a hillside along my driveway where they continue to bloom beautifully – and every fall I plant more in baskets.”

May
26
2011

Try This at Home:
Fresh Peonies Months from Now

In the early 1900s, peonies reigned as one of the country’s leading cut-flowers, in part because they can be stored in bud for months. Yes, months! And it’s surprisingly easy.

Here’s how you can do it yourself, in an article adapted from The American Cottage Gardener magazine by our good friend Nancy McDonald.

“Choose perfect buds of semi-double to double varieties (the heaviest ‘bomb’ types and singles don’t work as well). In the cool of early morning or late evening, cut buds on six-inch stems, just as the petals begin to loosen but are not yet open.

“Place in gallon-size, zip-lock freezer bags. I put ten to twelve buds per bag, with half the heads facing one way and half the other. Wet a small, new, cellulose sponge or clean dishcloth, wring it out so it’s just barely damp, and put it in the bag. Gently work as much air as possible out of the bag and seal it.

Try This at Home: Fresh Peonies Months from Now – www.OldHouseGardens.com

“Store flat in your refrigerator. You may wish to put the bag in a plastic storage box, so the buds don't get bruised by people rummaging for that last chicken leg. Make sure everyone in the house knows that they are not to be eaten.

“After the peonies outdoors are just a fragrant memory, start enjoying your stored ones. Cut an inch of stem (underwater is best) and put the peony in water all the way up to the bud. Within half an hour it will begin to open. Arrange in a vase or float in a bowl of water (a charming way to display peonies anytime). Floating ones seem to last the longest.

“Trim stems an inch shorter each day, if needed. Using this simple technique, I have stored buds for as long as three months, and dazzled everyone with bouquets in early September.”

And you can, too!

Apr
21
2011

When Bulbs Don’t Bloom: Top 10 Reasons Why

Most bulbs are easy to grow – and of course we guarantee everything we sell 100%!

But sometimes even the best bulbs don’t bloom well. If that ever happens in your garden, it might be because:

1. Leaves removed too early. To multiply and recharge for future bloom, bulbs need to photosynthesize. The more the better, so leave foliage alone until it yellows.

2. Planted too late. Bulbs need to establish good roots before the ground freezes. Bulbs stored too long, especially small ones, may dry out so much they struggle or fail.

3. Fall was too dry. Good root growth in the fall is essential for good bloom in the spring, and roots can’t grow well in dry soil.

4. Too much shade. Most bulbs need plenty of sun, more the further north you garden. As nearby trees and other plants grow, once sunny areas may become too shady for bulbs.

5. Soil too wet. In heavy, clay, or water-logged soils, many bulbs struggle or rot. Plant in sandy to average soils, improve heavy soils with organic matter, or plant in raised beds. Even average soils can be too damp for some bulbs during their summer dormancy. This is especially true for tulips in the rainier eastern half of the country and in gardens that are regularly watered.

6. Over-crowded. As bulbs multiply they can become so congested that they’re starved for moisture and nutrients. Gently dig and divide.

7. Too small. You’ll never have this problem with our bulbs, but under-sized bulbs are widely sold. In difficult conditions, even the best bulbs can dwindle until they’re too small to bloom.

8. Wrong climate. Both winters and summers can be too cold or too warm, too wet or too dry, depending on the type of bulb. Tulips, for example, need a certain number of winter hours below a certain temperature or they won’t bloom, and they rebloom best where summers are dry.

9. Under-fed or over-fed. Bulbs can starve in nutrient-poor soils, but over-rich soils cause problems, too. Too much nitrogen, for example, spurs leaf growth at the expense of flowering. Let a soil test guide you.

10. Animals, insects, or diseases. Burrowing rodents and daffodil flies can eat bulbs, leaving little trace, while other pests attack their flowers and foliage. Learn more here.

Whew! The good news is that most bulbs are tough and adaptable. And once you understand what they need, it’s even easier to keep them blooming gloriously year after year.

Mar
3
2011

How to Love Gardening
When Winter Drags On and On

“February and March are my favorite gardening months,” our good customer Carole Bolton wrote us last week – from snowed-in Coldwater, Michigan, where temperatures were well below freezing and the sun hadn’t been seen for days.

Had she lost her mind? Quite the contrary! For years now, Carole has been forcing hyacinths indoors every winter – lots of hyacinths – and this year’s “are especially beautiful,” she wrote. “They’re healthy, tall and fully flowered. They make the freezing rain and weather advisories bearable.”

To learn how to work magic like that yourself, see our Forcing How-To and our Forcing Newsletter Archives.

Aug
25
2010

How Winter-Hardy Are Your Glads?
Our Readers Report

Although most experts say gladiolus won’t survive winters colder than zone 8, our customers kept telling us theirs were returning like perennials in zones 7, 6, and even 5.

So we asked our readers, “Have your regular glads survived zone-6 or colder winters? And what do you think made that possible?”

Many replied (thanks!), and now you can read what they said along with our conclusions at oldhousegardens.com/HardyGlads.

Although warmer, shorter winters are probably the biggest reason why so many glads are surviving in colder zones, other important factors seem to include:

reliable snow cover,

winter mulch,

deep planting,

good drainage,

micro-climates,

plenty of sun, and

the time-tested vigor of heirlooms.

To add your two-cents to the discussion, email help@oldhousegardens.com. And if you’d like to experiment with glads as perennials in your own garden, we suggest starting with the tough little one that our readers recommended the most: ‘Atom’.

Sep
10
2009

Bulls-Eyes and Stars:
How Many Bulbs Do I Need for This Space?

Bulls-Eyes and Stars: How Many Bulbs Do I Need for This Space – www.OldHouseGardens.com

To easily answer that question, check out our new web-page, “Bulbs per Square Feet: For Pattern-Beds or Anywhere.”

There you’ll find a few simple charts and formulas to help you figure out:

(a) the square footage of any planting area and

(b) how many bulbs you’ll need to fill that space, whether they be crocus at 3 inches apart, lilies at 18 inches apart, or anything in between.

But we didn’t stop there. Hoping to inspire you to try a bit of historic pattern-bedding, we added antique images and advice from historic catalogs in order to show you how to plant bulbs in true Victorian style.

It’s easy and fun – and not just for grand public gardens like Keukenhof or the lawns of Victorian mansions. Take a look!

Nov
21
2008

If Javelinas Roam Your Garden, Plant Iris!

Though we didn’t include bearded iris on our recent list of animal-resistant bulbs, our good customer Louise Coulter of Payson, Arizona, emailed us to vouch for them:

“In my area which is at 5,000 feet in Arizona‘s northern section there is an animal called javelina or wild pig. With cloven hoofs, tusks, and large foraging families, it devastates unprotected bulbs in gardens – except for iris. Seems they can’t eat iris. So at thousands of homes here, where the yards are unfenced, iris naturalize and are ubiquitous.”

Jan
16
2008

Book of the Month: Garden to Vase

Book of the Month: <i>Garden to Vase</i> – www.OldHouseGardens.com

If you like picking bouquets from your own garden – and who doesn’t? – Garden to Vase is a refreshingly down-to-earth guide full of great advice for getting all sorts of flowers to look better and last longer when cut.

Did you know, for example, that your daffodils will stay in top shape much longer if you let them sit for twenty minutes in a bucket of water while their gooey sap drains out?

And Garden to Vase goes way beyond technical advice. Author Linda Beutler writes as if she were your next-door neighbor, offering tips for collecting vases, using what you already grow, and making cut flowers an everyday pleasure in your home.

She’s funny, encouraging, irreverent, and real. “Don’t be afraid to get this book dirty,” she writes, and we plan to do just that.

In fact, we liked Linda’s advice so much that we asked her if we could post excerpts from it at our website. She was glad to help (thank you, Linda!), so check out our new “Bulbs in Bouquets” page. There you’ll find both cut-flower fundamentals and bulb-by-bulb specifics (“harvest peonies in the ‘soft marshmallow’ stage,” for example) for everything from Abyssinian glads to tulips.